Archive

Monthly Archives: August 2016

Power BI has a pretty cool option that allows you to specify that a field within your report is a URL to an image file. This allows us to add images to our reports based on the data that we are showing, giving our reports a little more pizazz and also makes the data a little more relatable by the users.

Even if there are no images within the data that you are reporting on, you can easily mash up images from other web sites like SharePoint into your Power BI reports.

In this walkthrough we will show you how you can do this by incorporating product images stored within SharePoint into a simple product dashboard.

Getting Ready…

Within Dynamics we can store our product images against our products. But this is not very accessible through Power BI.


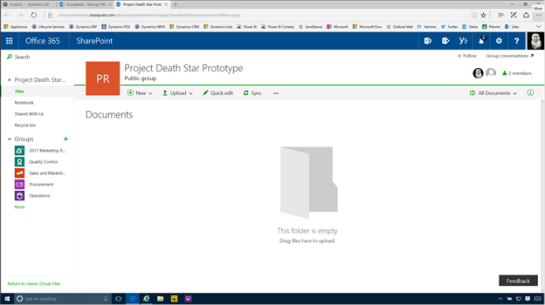
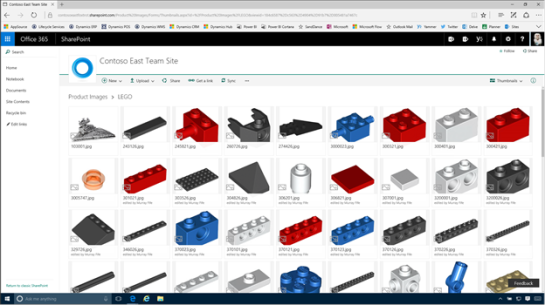
So to get around this problem we have created a curated site within SharePoint that is accessible by all of the users where we have saved away all of our product images.

Each of the images has been given a file name which is the same as the product number.


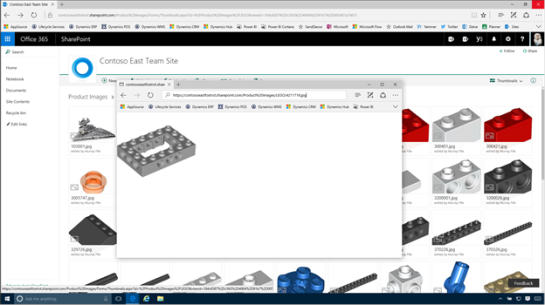
This will allow us to access the product image through a URL by specifying the part number within the URL.

We will see why this is useful in just a couple of slides.


How to do it…

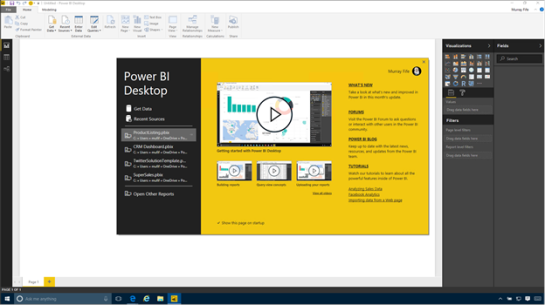
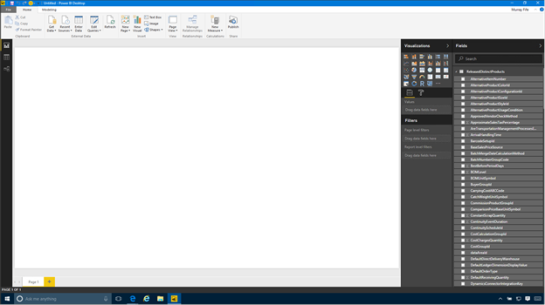
To start off, lets create a new Power BI report. To do this, just open up Power BI Desktop and then click on the Get Data menu item on the splash screen.


When the Get Data selection form is shown, click on the Other data source types and then click on the OData Feed option. Then click on the Connect button.


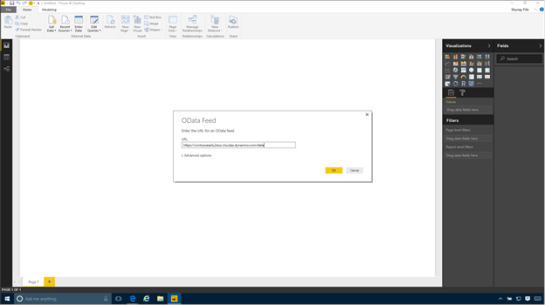
When the OData Feed configuration dialog is shown, we just need to paste in the URL for our Dynamics tenant and then add /data to the end. Then click on the OK button.


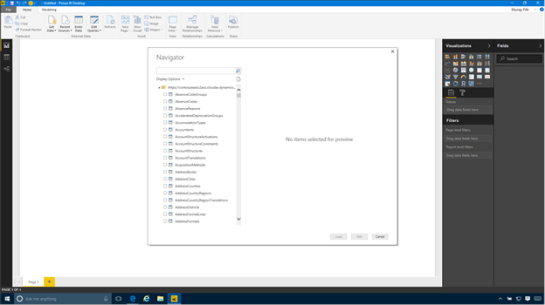
Within a few seconds, Power BI will connect to the OData feed and return back with all of the entities that we can report off.


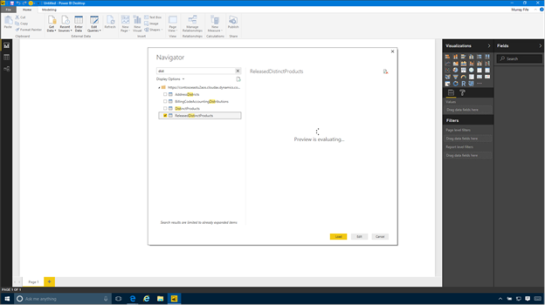
Filter down the list of entities until you can see the ReleasedDistinctProducts entity, select it and then click on the Load button.


This will return you to the reporting designer and we will see that we now have a table that we can report off.


But we don’t have a URL that we can use as an image yet. We need to modify our query a little to get this working.

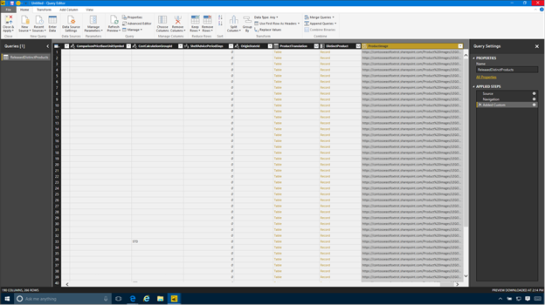
Start off by clicking on the Edit Queries button and then click on the Edit Queries submenu.


This will open up the query editor with all of our fields in the data source.


Switch to the Add Column ribbon bar and click on the Add Column button,


This will open up the Add Custom Column dialog box and we can start creating a new field that will point to our images within SharePoint.


Start off by updating the New Column Name to something a little more descriptive – like ProductImage.


Then enter in the formula that you want to use to create the field contents.

For example, here we just create a string using the URL for our SharePoint site as the base URL, and then insert the Product Number field.

https://contosoeastfoxtrot.sharepoint.com/Product%20Images/LEGO/” & [ProductNumber] & “.jpg”

Then click on the OK button.


The next thing that we know we will have a field that we can use within our report that points to our product images.


Now that we have created the field we can just click on the Close and Apply button to update the query.


There is one last step though that we need to do before we can start using the image within the report, and that is to tell the system that the field is an Image URL and that it should show the field as an image rather than as the URL string.

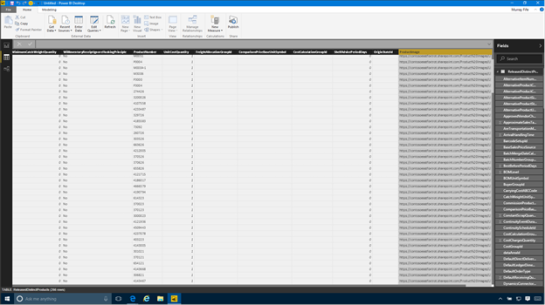
Start off by switching to the table data view within Power BI Desktop and then select the new field that we created.


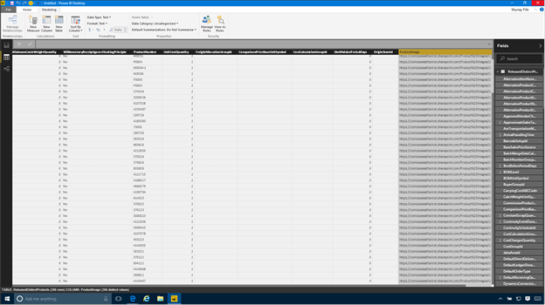
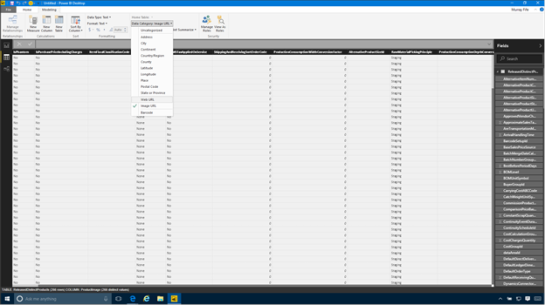
Now switch to the Modelling tab within the ribbon bar. Within the Properties section there is a selection field called Data Category that we use to manipulate how the fields get displayed.


If we click on the dropdown list we can select the Image URL category to tell the system to display it as an image.

After we have done that we are ready to start using it.


How it works…

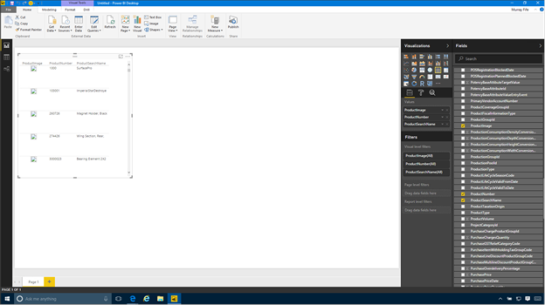
Now we can just add in the ProductImage field into our dashboard.

But, you are probably saying, the images are not showing.

The images unfortunately don’t show on the Desktop Designer.


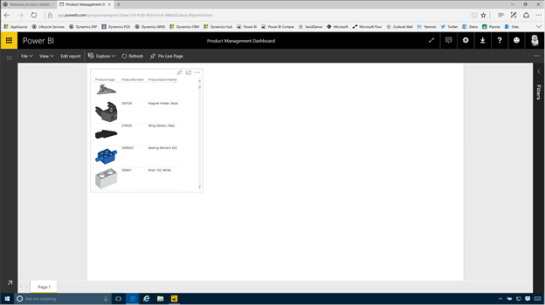
But they do show up on the Power BI Online version. So all we need to do is click on the Publish button and then save the new dashboard that we created to PowerBI Online.


Now when we look at the report within PowerBI Online we will see that our images start showing up on our reports.


Review

We can use images a number of different ways to add a little context to our reports. For example, we could use them for different groups of data like customer groups, or geographic segments. We can also use the images within filters and also data cards to help make the information a little more interesting.

All we need to do is create the image repository.

How cool is that!

About the Author

Murray Fife is an Author of over 25 books on Microsoft Dynamics AX including the Bare Bones Configuration Guide series of over 15 books which step the user through the setup of initial Dynamics AX instance, then through the Financial modules and then through the configuration of the more specialized modules like production, service management, and project accounting. You can find all of his books on Amazon at http://www.amazon.com/author/murrayfife.

Murray is also the curator of the Dynamics AX Companions (www.dynamicsaxcompanions.com) site which he built from the ground up as a resource for all of the Dynamics AX community where you can find walkthroughs and blueprints that he created since first being introduced to the Dynamics AX product.

Throughout his 25+ years of experience in the software industry he has worked in many different roles during his career, including as a developer, an implementation consultant, a trainer and a demo guy within the partner channel which gives him a great understanding of the requirements for both customers and partner’s perspective.

For more information on Murray, here is his contact information:

Email:
mcf@dynamicsaxcompanions.com
Twitter:
@murrayfife

Facebook: facebook.com/murraycfife
Google: google.com/+murrayfife
LinkedIn: linkedin.com/in/murrayfife

Blog: atinkerersnotebook.com

Docs: docs.com/mufife
Amazon: amazon.com/author/murrayfife

Creating mobile apps for Dynamics has never been an easy task in the past because they have always required developers and a lot of coding. And then having to integrate the app that you create is another story, requiring even more coding and developers. Creating a mobile app has not been something that you normally want to take on unless there is a huge need, and usually a hefty budget.

But, with the introduction of the PowerApps platform that changes a little. Now we can create mobile apps that use a new feature called the Common Data Model by using the PowerApps designer, and then trigger updates to Dynamics through another new tool called Flow. All of this is possible with just a little bit of work, and also no development or coders required.

In this walkthrough we will show how you can do this without breaking a sweat.

Accessing the Contact Table in the Common Data Model

In order to create an application we need to have somewhere to store all of the data. For this example we will use the Common Data Model Entities as the staging area for our contacts and then have them trigger events to update the data within the other subsystems of Dynamics.

To see all of the tables (including the Contact table) all we need to do is open up the PowerApps portal, and then click on the Entities link in the menu bar.


This will open up a list of all the entities that are available. In this case, these are all of the entities that are created when the Common Data Model database was created for us.


If we drill into the Contacts entity then we will be able to see all of the standard fields that are available for us to use within our applications.

In the top right hand corner is a link that allows us to Open in Excel.


If we click on that it will open up the table in Excel and allow us to maintain the data that is in there, and also see as new records are created. We will leave this open for now because it will allow us to see the data records as we create them in the next step.


Creating Our Registration PowerApp

Now we will start creating our PowerApp mobile application. For this example we will use the PowerApps desktop version which we downloaded from the Microsoft Store.

All we need to do to start creating our app is to click on the Phone Layout link within the Blank app section of the Create an app group.


This will open up the PowerApps canvas where we can start building our application.


Rename the first screen

The initial application will only have one screen that we will start configuring. Later on we will add another screen that we will call from here, but before we do that, let’s make a quick change.

If we select the Screen1 page, and then look within the Home ribbon bar, we will see a button there with the same name. If we click on this button, a rename option will show up and we can change the name from the default name to something a little more useful. In this case we will set it to Welcome for the Welcome screen.


Adding a Connection to the Common Data Model Entity

The next thing that we will want to do is to connect the application to the table within the Common Data Model. To do this all we need to do is click on the Content ribbon bar and we will see that there are a couple of options available for us.

In this example we will want to click on the Data sources button.


This will open up a panel on the right where we will define all of the data sources that we want to use in this application.

To add a data source, all we need to do is click on the Add data source button.


This will open up a number of different data source options for us. The one that we are interested in this example though is the one that is linked to our Common Data Source (the second one down in the list). All we need to do is click on it.


Then we will be asked which Common Data Model that we want to use. In this case we have a couple of different models, but I want to connect to the My database.


This will then open up all of the Entities that are available for us to connect to our application. Here we will want to select the Contact entity and then click on the Connect button.


Now we have a data source that we can use in our application.


Creating additional Pages

For this application we are going to start with a Welcome page with a link that then allows people to create new records within the Common Data Model entities. So the next step in the process is to add a second screen. To do this, click on the Insert ribbon bar, and then click on the New Screen button.


This will create a second screen for us.


We will change the name of the new screen from the default name to Signup.


Adding a Editable registration form

Now we will want to add a way for the users to add records into the table. To do this we will want to click on the Forms button within the Insert ribbon bar and then click on the Edit button.


This will add a new form onto the page. But it is not connected to any data source yet. To fix that, click on the No data source selected link on the right and we will see that our Contact data source is available for us to select from. Let’s do that.


After selecting the data source we will see all of the fields that we can add to our form. Right now none are selected though.


All we need to do is click on the eye icon beside the field to toggle them from hidden to visible.

Here we added the following fields:

First Name

Last Name

Full Name

Thumbnail

This will allow us to get our recruit details and also a picture for reference.


Adding some navigation buttons

Now that we have created our edit form, we will want to add some buttons to control the navigation within the form.

We will start off by adding a button to submit the sign up details for the form. To do this we just click on the Button button within the Insert ribbon bar.


This will add a new button to the Signup form.


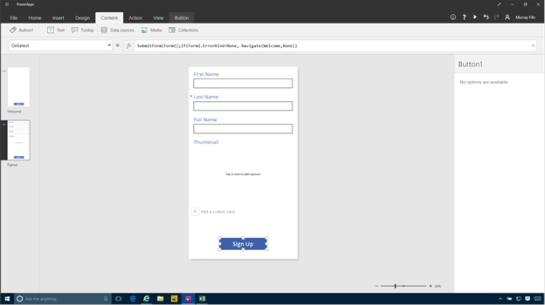
We will want to change the name of the button a little. To do that we just double click on the button and then we can edit the text and change it to Sign Up.


We will also want a button on the welcome page to click in order to open the record details page. So we can just copy the button from the Signup page and paste it into the Welcome page.


Creating a New Record action

Now we will want to make our button do something. If we click on the button, then we will notice that the events will show up as a dropdown list underneath the ribbon bar. We will want to select the OnSelect event to create an action whenever the button is clicked.

Now we want to say what the action is that we want to perform. Within the fx field type in:

NewForm(Form1)

This says that when we click on the button, create a new record in Form1, which is our edit form within the Signup page.


But we don’t want to stop there. We need to also switch pages and navigate to the Signup page for someone to enter in their details. So we will add the following to the end of the function:

;Navigate(Signup,ScreenTransition.None)

This tells the system to navigate to the Signup screen and then have no transition effects.

Also. note the ; which separates the two commands.

The final command should look something like:

NewForm(Form1);Navigate(Signup,ScreenTransition.None)


Creating a Save Record action

Now we will want to create an action that allows the users to save their signup information after they have filled out the form. To do this we will swap to the Signup form, select the Signup button and then select the OnSelect action.


For this action we will want to submit the form to the database. So within the fx editor start by adding the following command:

SubmitForm(Form1)

This will submit whatever is in the form to the Common Data Model.


We are not quite finished though. If there are no errors in the form then we will want to return back to the welcome screen. So we will want to add the following action:

;If(Form1.ErrorKind=ErrorKind.None, Navigate(Welcome,ScreenTransition.None)

This tells the system to check for an error and if there isn’t one then return back to the welcome screen.

The full action is:

SubmitForm(Form1);If(Form1.ErrorKind=ErrorKind.None, Navigate(Welcome,ScreenTransition.None)

Taking the form for a test drive

Now that we have created our application we can take it for a spin. To do this, click on the Welcome form and then click on the Play icon in the menu bar in the top right hand corner of the designer.


This will open up the form as if it were a real app, and we will be on the Welcome screen with the sign up button. All we need to do is click on it.


This will open up the Sign up form and we can fill in all of our details and add a picture before clicking on the Sign Up button to submit the record to the common data model entity.


If everything goes well then we return back to the main form.


If we return to our Excel file that is linked to the Contacts entity and click on the Refresh button we will see that a new record has been added to the form.


Embelishing the PowerApp Forms

The application that we just created is pretty functional as it is and would work perfectly well out in the field, but it is a little boring. So we will want to embellish the form a little. The first thing that we will do is add a background image to the form.

To do this we will select the page and then click on the Screen ribbon bar. Then click on the Background button and select the Add an image file option.


This will add open up the file explorer and we can select a background that we want to use on the form.


Then we can change the background fill to make it match the image.


Finally we will change the button to make it look less like a button by removing the border and fill and then changing the font a little.


Then we repeat the process for the Sign Up form, and make sure that all o the labels look nice.


Creating a Flow to update Dynamics

Now that we have our recruitment form all set up and are capturing the information within the Common Data Model Entity we will want to start doing things with it. To do this we will take advantage of Flow which will watch for information changing within the entities and then allow us to update other systems including Dynamics.

To do this we will open up Flow and then click on the Create from blank button.


This will create a new Flow template for us, and the first thing we need to do is select the event that we want to use to trigger the flow. If we click on the search field then we will see that there are a number of different options including the Common Data Model – When an object is created trigger.


After we have selected that trigger then we will see a couple of configuration fields that we need to specify.


When we click on the Namespace option we will be able to select the Common Data Model database that we want to watch.


And then we can select the Entity that we want to watch, which in this case is the Contact entity.


Adding a new Action to create a Contact in Dynamics

After we have done that we can click on the New Step button and then select the Add Action button to add a new cation that gets performed when a new contact is added.


When the search box is displayed we can search through all of the actions that are available to us. These are different from the triggers and we can scroll down and find the Dynamics CRM Online – Create a new Record option.


Now we need to link the action to our CRM instance.


If we click on the Organization Name dropdown we will see that our CRM instance is available to us.


And then we can click on the Entity Name dropdown and select the Contacts entity from CRM.
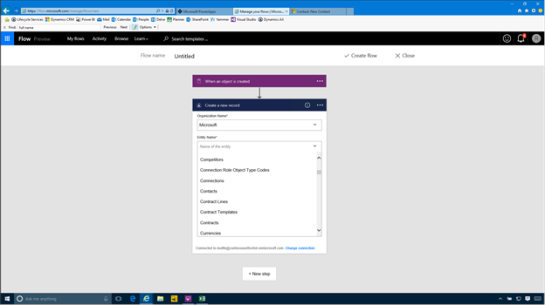

This will then show us some more fields to update.


When we click on the Last Name field we will see all of the fields that are available for us to put in the field.


Just click on the Last Name field from the Common Data Model entity and it will be added to the field.


If we click on the Show Advanced Options button we will see that there are more fields that we can update.


Here we updated the First Name as well.


Adding an Action to create a Lead in Dynamics

Additionally we added another step that we want to perform when the contact is created, and that is to create a Lead. We went through the same process as we did with the Contact, except we just select the Lead entity type from CRM.


Publishing the Flow

After we have done that we can publish the Flow and start it running in the background. To do this we start off by giving our Flow a Flow Name and then click on the Create Flow button.


That will save the Flow away for us and then we can close out of the page.


When we return back to our list of Flows we will see that we have a new flow process registered.


Testing out the Flow automation

Now that we have created our flow we can test it out. To do this we will just return back to our PowerApp and register a new contact.


Then return to Flow and click on the i icon to the right of our new Flow to see the flow details.


This will show us all of the events that have been triggered and after a bit we should see that the flow has been successfully processed.


When we open up Dynamics we will see that the contact has been created for us.


And also a new lead has been created for us as well.


Review

With just a little bit of work we have been able to create a new mobile application that captures contact information within the Common Data Model and then created new records within Dynamics without writing a single line of code (functions don’t count).

How cool is that.

About the Author

Murray Fife is an Author of over 25 books on Microsoft Dynamics AX including the Bare Bones Configuration Guide series of over 15 books which step the user through the setup of initial Dynamics AX instance, then through the Financial modules and then through the configuration of the more specialized modules like production, service management, and project accounting. You can find all of his books on Amazon at http://www.amazon.com/author/murrayfife.

Murray is also the curator of the Dynamics AX Companions (www.dynamicsaxcompanions.com) site which he built from the ground up as a resource for all of the Dynamics AX community where you can find walkthroughs and blueprints that he created since first being introduced to the Dynamics AX product.

Throughout his 25+ years of experience in the software industry he has worked in many different roles during his career, including as a developer, an implementation consultant, a trainer and a demo guy within the partner channel which gives him a great understanding of the requirements for both customers and partner’s perspective.

For more information on Murray, here is his contact information:

Email:
mcf@dynamicsaxcompanions.com
Twitter: @murrayfife

Facebook: facebook.com/murraycfife
Google: google.com/+murrayfife
LinkedIn: linkedin.com/in/murrayfife

Blog: atinkerersnotebook.com

Docs: docs.com/mufife
Amazon: amazon.com/author/murrayfife

Collaboration workspaces for Projects are a great way to provide a central repository for all of your project documents that everyone (or at least everyone that you want to) can have access. This takes advantage of the SharePoint Sites that Dynamics is able to automatically create if you like.

But with Office 365, a new option is available to us, and that is the Office 365 Groups. Groups provide a couple of additional features that make it a better alternative to the SharePoint sites because it allows you to create your own personal group, with its own OneDrive for Business repository, Project OneNote Notebook, Project Calendar, Project Conversation board and much more.

Although Dynamics does not automatically create the group for us, that doesn’t mean that we can’t use this for our workspace though, all we need to do is link the group to our Project. This is a small tradeoff for what this give us in return.

How to do it…

To do this, all we need to do to start off with is to open up Office 365 and go into Outlook. We will see that all of our Groups are shown on the left hand side of the view.


Just click on the + button to create a new group.


Then give your new group a Name that has not been taken. A quick tip here is to prefix all of the project groups with Project to help make them unique.

After we have done that we can just click on the Create button.


After the group is created, we will also be asked to invite any project members that we may want to have access to the project right away. We can search through our company directory and find the common project members.


After we have selected all of our project members then we just click on the Add button to add them to the Group.


After doing that we will have a new Office Group that we can start using to track all of our documents.


After embellishing it a little bit we are ready to start taking advantage of the group for our project collaboration.

To do this we want to click on the View Group Files and Activity link.


This will open up the document repository that is connected to the Group.


All we need to do is copy the base URL – everything up to the Shared Documents part of the URL.


Now we will want to connect the Document workspace to the project. In order to do this we will want to open up the project and then click on the Collaboration Workspace link within the Project ribbon bar and then click on the Link collaboration workspace option.


This will open up a dialog panel for us where we can specify the Internal and External URL for the collaboration site. All we need to do here is paste in the URL’s and then click on the OK button.


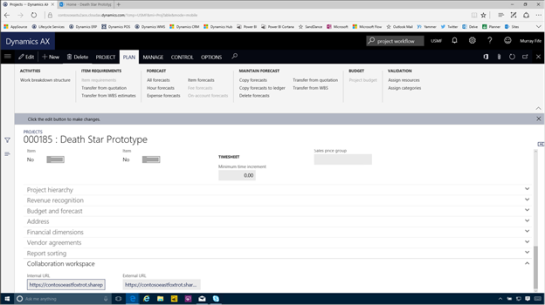
When we return back to the project we will see that the URL’s now show up in the Collaboration Workspace fast tab.


If we click on the link then we will be able to access all of the documents that have been filed away against the Office 365 Group.


As a bonus we have a OneNote Online notebook just for the Office Group.


And as a bonus bonus, we can create our own Planner task boards that are associated just with the Office 365 Group.


Review

How cool is that?

PS. This is a rhetorical question – Office Groups and Collaboration workspaces go together like Peanut Butter and Jelly.

About the Author

Murray Fife is an Author of over 25 books on Microsoft Dynamics AX including the Bare Bones Configuration Guide series of over 15 books which step the user through the setup of initial Dynamics AX instance, then through the Financial modules and then through the configuration of the more specialized modules like production, service management, and project accounting. You can find all of his books on Amazon at http://www.amazon.com/author/murrayfife.

Murray is also the curator of the Dynamics AX Companions (www.dynamicsaxcompanions.com) site which he built from the ground up as a resource for all of the Dynamics AX community where you can find walkthroughs and blueprints that he created since first being introduced to the Dynamics AX product.

Throughout his 25+ years of experience in the software industry he has worked in many different roles during his career, including as a developer, an implementation consultant, a trainer and a demo guy within the partner channel which gives him a great understanding of the requirements for both customers and partner’s perspective.

For more information on Murray, here is his contact information:

Email: mcf@dynamicsaxcompanions.com
Twitter: @murrayfife

Facebook: facebook.com/murraycfife
Google: google.com/+murrayfife
LinkedIn: linkedin.com/in/murrayfife

Blog: atinkerersnotebook.com

Docs: docs.com/mufife
Amazon: amazon.com/author/murrayfife

Dynamics ERP is great by itself as a transactional system, but when you incorporate all of the other services that are available through Office 365, it becomes even more powerful.

In this worked example we will show a quick scenario to illustrate this where the users can collaborate using these tools, and show how a Project Administrator is able to quickly find out information about a questionable project that just landed within their workspace.

How it works…

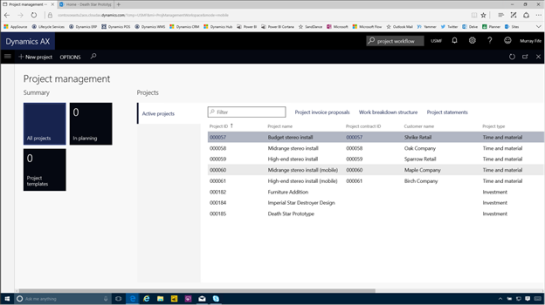
The project administrator logs into their Project Management workspace to review all of the active projects and notices a new project that has been added that piques their interest.


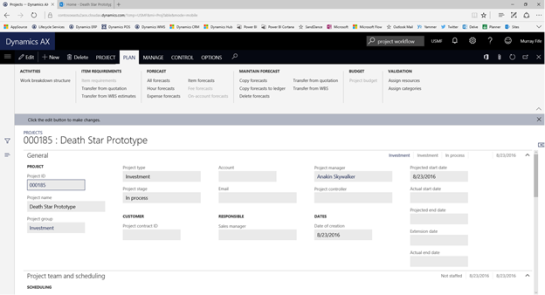
They open up the project details to find out a little more information on the project.


Drilling into the Project Work Breakdown Structure, they have a couple of concerns regarding the project plan.


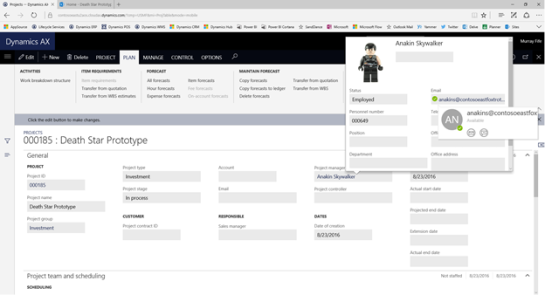
They return back to the project and see that a Project Manager has been assigned, and they open up the contact card and see that the Project Manager is online via Skype through the Presence indicator.


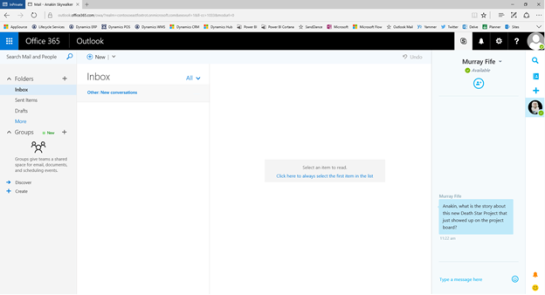
The project administrator starts a Skype conversation with the Project Manager.


The Project Manager is currently online within Office 365 and gets a notification that the Project Administrator is wanting to talk to them, and accepts the conversation.


Through Office 365 they are able to use Skype online without having to open up a Skype client.


The Project Manager drops the Project Administrator a quick note describing the project objectives and the status of the project.


The Project Administrator confirms that the project is a go through Skype.


The Project Manager adds a quick note to tell the Project Administrator that there are also more details on the project within the SharePoint Collaboration Workspace where they are storing more information about the project.


The Project Administrator clicks on the Collaboration Workspace link within the Project details.


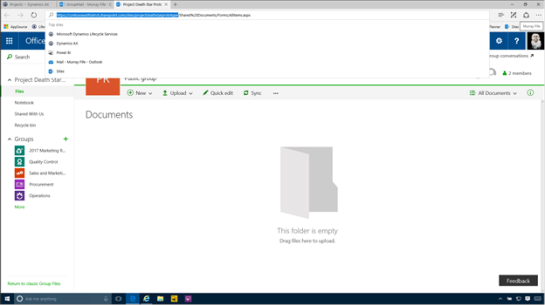
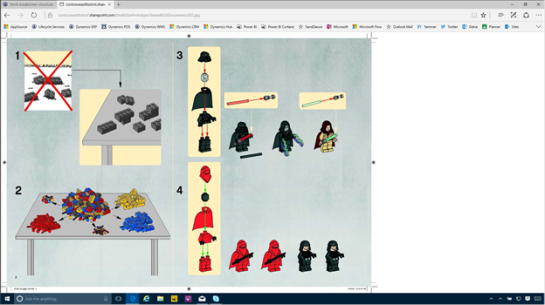
They open up the Project Collaboration workspace and see that there are some additional documents that have been saved away within SharePoint.


This allows them to see more information about the project.

Everything looks pretty well planned out.


Review

How cool is that.

More Information

If you want to see the scenario, I posted it here on docs: https://doc.co/tvw8jv

About the Author

Murray Fife is an Author of over 25 books on Microsoft Dynamics AX including the Bare Bones Configuration Guide series of over 15 books which step the user through the setup of initial Dynamics AX instance, then through the Financial modules and then through the configuration of the more specialized modules like production, service management, and project accounting. You can find all of his books on Amazon at http://www.amazon.com/author/murrayfife.

Murray is also the curator of the Dynamics AX Companions (www.dynamicsaxcompanions.com) site which he built from the ground up as a resource for all of the Dynamics AX community where you can find walkthroughs and blueprints that he created since first being introduced to the Dynamics AX product.

Throughout his 25+ years of experience in the software industry he has worked in many different roles during his career, including as a developer, an implementation consultant, a trainer and a demo guy within the partner channel which gives him a great understanding of the requirements for both customers and partner’s perspective.

For more information on Murray, here is his contact information:

Email: mcf@dynamicsaxcompanions.com
Twitter: @murrayfife

Facebook: facebook.com/murraycfife
Google: google.com/+murrayfife
LinkedIn: linkedin.com/in/murrayfife

Blog: http://www.atinkerersnotebook.com

Docs: docs.com/mufife
Amazon: amazon.com/author/murrayfife
Managing security within Microsoft Dynamics has just got a little easier because there is a feature called Security Diagnostics that is built into all of the forms that allows us (if we have rights that is) to see all of the Roles, Duties, and Privileges that have access to a form, while we are on the form itself.

Also this feature allows us to even update the user security access while we are browsing this information as well, so if we want to give someone access, we don’t have to guess which security objects have access and then update the security. We just find the form and then give them access.

How it works…

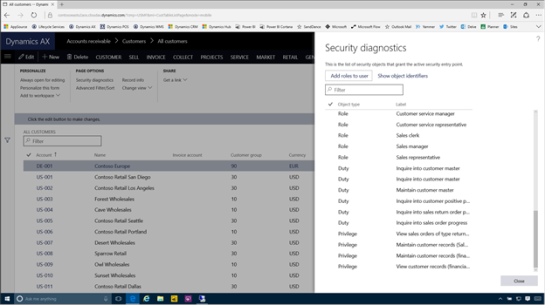
To see the security information for any form, just click on the Options tab on any of the forms, and then click on the Security Diagnostics link within the Page Options group.


This will open up the Security Diagnostics panel and we will be able to see all of the Roles that have access to this form.


Also, if we scroll down a little then we will also see all of the Duties and Privileges that are associated with this form as well.

If we want to modify the security on the fly and assign the security objects to a user, then all we need to so is select the security object and then click on the Add roles to user link.


This will open up the security maintenance form and we can update the user security on the fly.


Review

This is a very useful feature to keep in our back pocket. Although it doesn’t make security management a super simple function, it does make it a little simpler.

With Update 1 of Microsoft Dynamics, a new feature was introduced which allowed us to inject social feeds into the Workspaces.

Initially this was just for Yammer and Twitter, but with Update 2, LinkedIn was also added as additional feed options, allowing us to add tiles for User Profiles, Company Profiles, Company Insider information and even Alumni feeds.

This is a great way to add more social intelligence to Dynamics, and the following set of walkthroughs show how it all works.

Getting Ready

Before we start, there is a little bit of housekeeping that we need to take care of and that is to add a LinkedIn Social Feed to our workspaces. Although the feed will work for any of the existing feeds that we have in our workspaces, it’s tidier to add a new feed panel, so that we don’t overwrite any of the other social feeds we have.

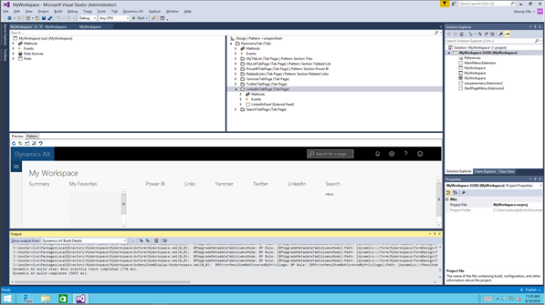
To do this, we just need open up our Workspace within Visual Studio and duplicate one of the existing panels and give it a LinkedIn title.


Now we can return to Microsoft Dynamics and find our Workspace with the new LinkedIn Feed. In this case it’s our My Workspace workspace.


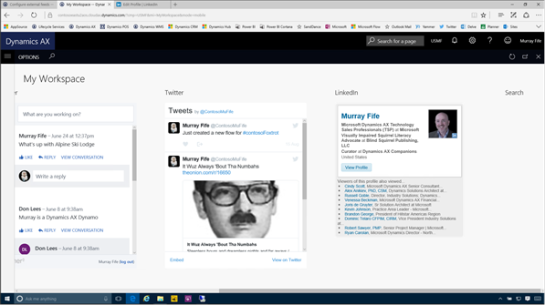
Within the workspace we will now see that we have a placeholder for all of our LinkedIn feeds.


Configuring a LinkedIn Member Profile Feed

Now that we have a panel for out LinkedIn feeds, let’s start configuring it to show some content. We’ll start by setting it up to show LinkedIn member profiles.

Start off by returning to the workspace with the LinkedIn tile and click on the Configure the content source link at the bottom of the feed.


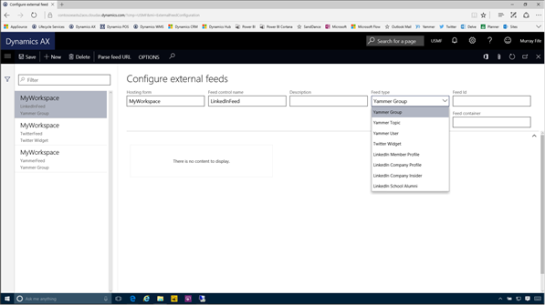
This will open up the configuration form, and we will be able to see all of the feeds that have already been configured. To add a new LinkedIn content source just click on the New button in the menu bar.


This will create a new record that is linked to the Feed Container that we selected originally, and if we click on the Feed Type dropdown list we will see that there are a number of new content sources from LinkedIn.


Select the LinkedIn Member Profile option for this example, and then enter in the URL for the member that we want to show in the panel.


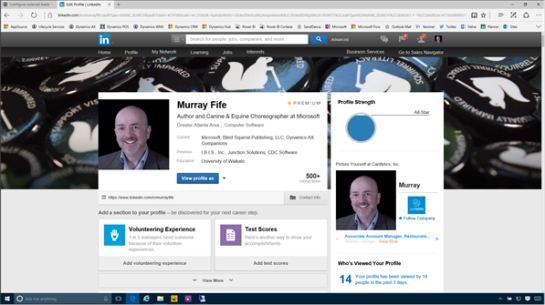
To find the URL, just navigate to the profile and then just select the initial part of the URL from LinkedIn.

For example, here we used:

https://www.linkedin.com/in/murrayfife

This is definitely a great profile to follow.


Then click on the Save button and we will be able to see a preview of the feed content within the configuration form.


When we return back to our Workspace and refresh the content we will see that our profile information will be fed to the LinkedIn social feed.


Configuring a LinkedIn Company Profile Feed

Sometimes you may want to track information about a certain company rather than a profile. In that case we just need to configure the social feed to show a company profile.

To do this change the Feed Type to be LinkedIn Company Profile, and then enter the Company ID into the Feed ID. Although you can type in the name of the company if you like, but it has to be unique, so the ID is better.


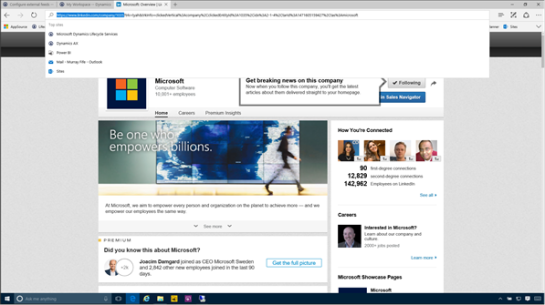
For example, here we found our most favorite company profile and found the company identification in the URL:

https://www.linkedin.com/company/1035


After saving the feed configuration we can return back to the workspace and refresh it – now we will have a company feed directly within our workspace.


Configuring a LinkedIn Company Insider Feed

Another type of feed that you can configure is a Company Insider feed. This allows us to see information about the people within the organization rather than just the organization information.

To do this we just change the Feed type to LinkedIn Company Insider and then put the company identification into the Feed Id.

In this case we just set it to Microsoft and then saved the feed configuration.


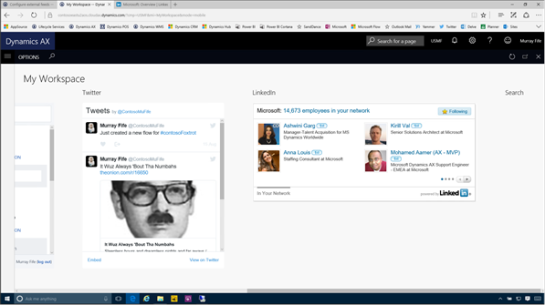
Now when we return to our workspace and refresh the page we will see information about the people that we are connected to within the organization and can also drill into the Company Insider information and track our connections.


Configuring a LinkedIn School Alumni Feed

Finally, we can also add feeds to Schools and Alumni. This is a great way to keep track of our favorite schools for recruiting, or just to track where all of our old friends have landed.

The first step is to track down the school that you want to track within LinkedIn and find the ID from the URL.

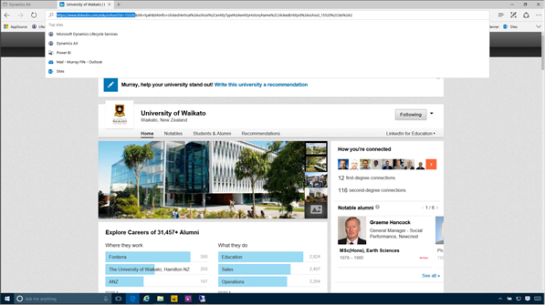
For example, here we found the University where I studied, and got a degree in Artificial Intelligence (about 20 years too early), and from here we can find the ID in the URL:

https://www.linkedin.com/edu/school?id=15520


To do this we just change the Feed type to LinkedIn School Alumni and then put the ID into the Feed Id and can save the feed configuration.


Now when we return to our workspace and refresh the page we will see information about our Alumni and also where they are working. It seems like I have a lot of connections in the Dairy industry.


Summary

The Social integration into the Dynamics workspaces is a great way to add social intelligence into our workday, and being able to add in LinkedIn intelligence makes it even better because it adds the professional links that we may want to track.

How cool is that.

If you are like me and having to study up on the MB6-892 Microsoft Dynamics AX Distribution and Trade content so that you can get your certification, then I may have something that you all would be interested in. After creating the master study guide for the course this week I decided that it would be a good idea to reformat all of the individual courses that are recommended as study content into mini study guides, and also add in a little more content for you all as well.

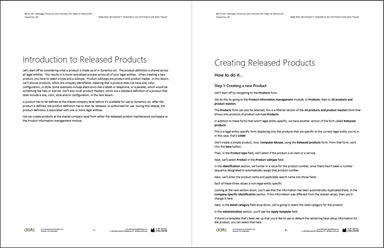
As a result, I have finished the second study guide for the 80741AE – Manage Products and Services for Sales in Microsoft Dynamics AX course and have released it for you all to take advantage of.

80741AE: Manage Products and Services for Sales in Microsoft Dynamics AX

This course is to teaches the skills needed to perform functions related to managing products and services for sales within Microsoft Dynamics AX, including features of the application, plus some “best practices” and some common usage procedures

Topics Covered

Module 1: Products and Services

  • Lesson 1: Creating Products and Services

Module 2: Item and Dimension Groups

  • Lesson 1: Creating Item and Dimension Groups
  • Lesson 2: Creating Item Model Groups
  • Lesson 3: Creating Product Dimensions
  • Lesson 4: Creating Inventory Dimension Groups

Module 3: Managing Inventory

  • Lesson 1: Use Inventory Tracking Through Serial and Batch Numbers
  • Lesson 2: Units of Measure

This guide is more comprehensive than the master study guide and has all of the walkthroughs documented:


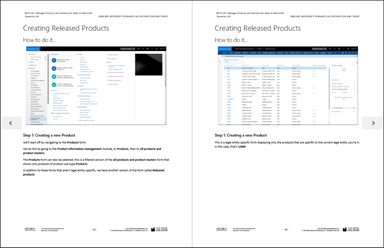
Additionally all of the walkthroughs have detailed walkthrough steps that show you each screen shot so that you can follow along with the guide visually:


Also the Exercises include the sample data in a format that is much easier to follow than what is in the original documentation:


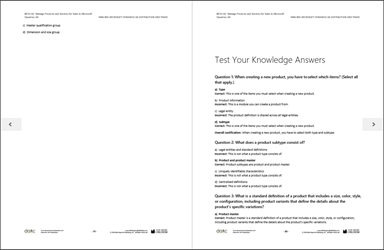
And of course there are all of the sample Questions, and also the Answers so that you can quickly test your knowledge:


Disclaimer: I have to admit, I didn’t write all of the content, I just made it usable, so if you want to do all of the legwork yourself, then all of this information is publicly available – apart from the screen shots which I had to do manually.

The guide has about 250+ pages all told so there is a lot of information for you all to help you with your studies.

If you want to check it out then here is the link to the download location: http://bit.ly/2bcHNhp

The Common Data Model is a feature within PowerApps that allows us to store data within a separate database that we can populate with data from other data sources and then within PowerApps. This allows us to create apps that don’t need to be connected to the lower level databases.

In this walkthrough we will show how we can take advantage of this and create a simple mobile maintenance form.

Configuring the Common Data Model Data

Before we start creating our PowerApps we will need to make sure that our Common Data Model is configured and has some data within it that we can use within our applications.

Getting ready…

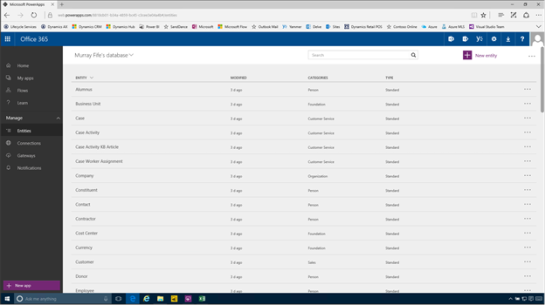
To do this we will just need to open up the PowerApps website and click on the Entities link within the Manage menu group on the left hand side for the page.

This will allow us to see all of the entities that are delivered with the Common Data Model.


If we drill into any of them we will be able to see all of the fields and objects that are included in the Entity.

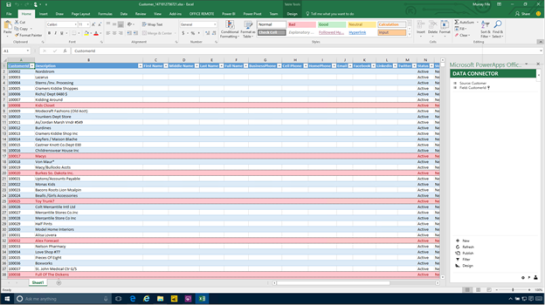
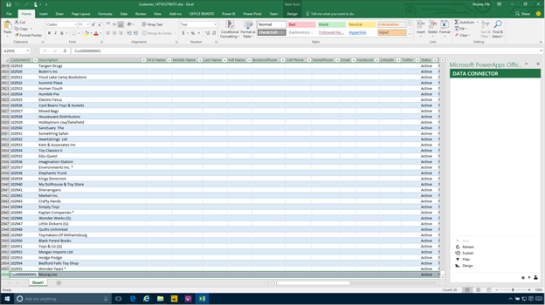
To view all of the data just click on the Open In Excel icon in the top right of the page.


This will open up Excel and also the PowerApps add-in for Excel and you will be able to see all of the data.

In this example we loaded in a few more records than the ones that are delivered in the demo database so that we would have a little more information to play with.


Creating a Power App

Once we have got our data loaded into the Common Data Framework we can move to the next step and create a new PowerApp that accesses the data.

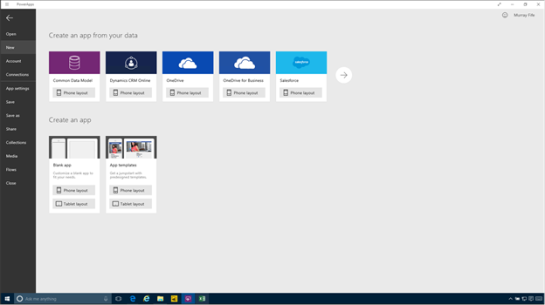
To do this all we need to do is open up Power Apps and click on the menu bar icon in the top left of the form. This will open up the menu for us and we can click on the New menu item.

Now we will see that there are a number of options available for us including an option to create an application from the Common Data Model. To start the process off we just need to click on the tile.


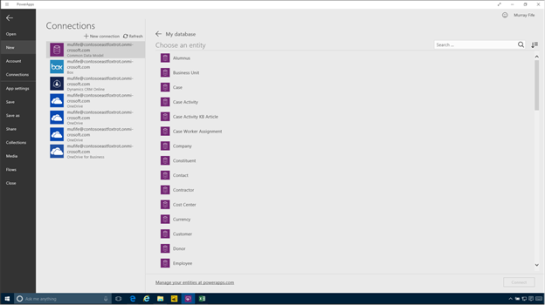
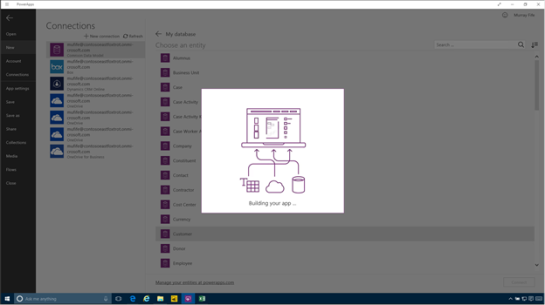
Next we will be given a list of all of the Connections that we can use for the PowerApp, and when we select the Common Data Model we will be able to see all of the entities that are available for us to connect to.


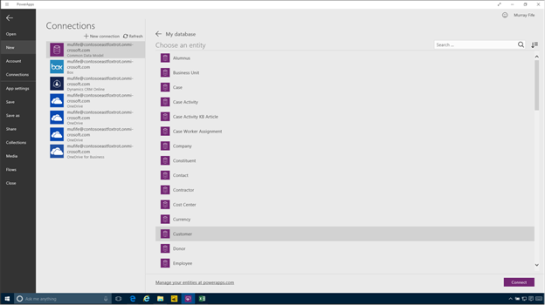
In this example we will select the Customers entity and then click on the Connect button.


This will start off the wizard that will build our initial PowerApp for us.


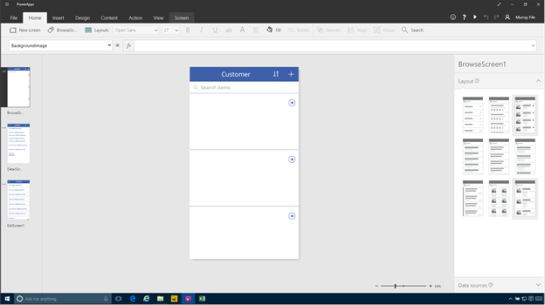
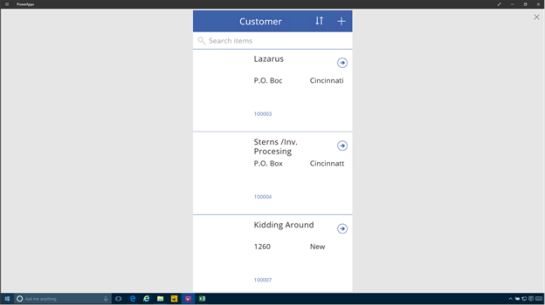
Within a couple of seconds it will return back with one of the default templates built for us which is already connected to our Common Data Model Entity.


Updating the Fields

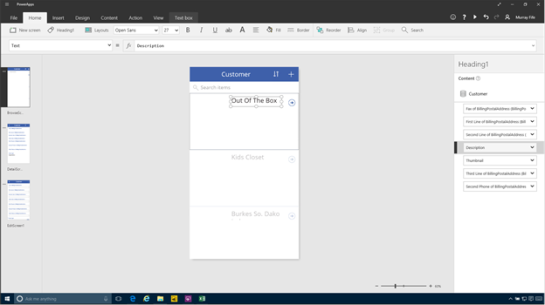
When PowerApps creates the initial application, it is just guessing about the fields that you want to show on the form, so we may want to change some of the fields that are selected by default and choose ones that are a little more useful to us.

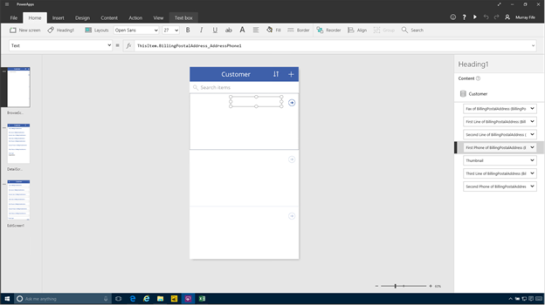
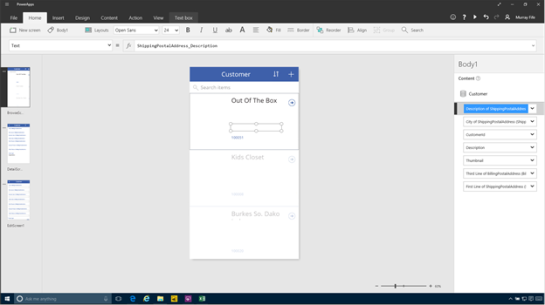
To do this all we need to do is select the field on the form template and it will show you all of the fields that are linked with the form.


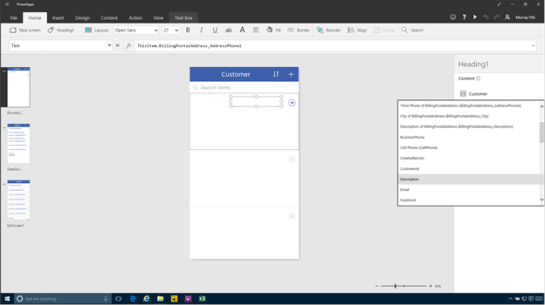
To change the field that you want to display, just click on the field and select the new one from the dropdown list.


Here we changed the first field to show the Description of the customer.


We can repeat the process and then change some of the other fields in the initial search panel to make the form more searchable.


Taking the PowerApp for a Test Drive

Once the PowerApp has been created we can test it out at any time and see how it works in the real world.

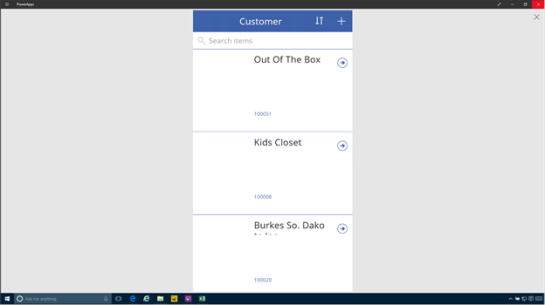
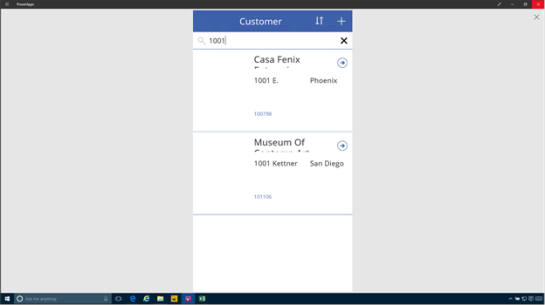
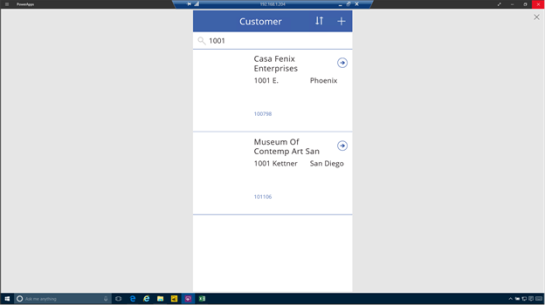
To test out the form, just click on the Play button in the header of the page.


This will open up the form in Preview mode and we will be able to see all of the records as if they were being displayed on a device – a Phone in this example.


If we want we can even test out the searching functions to filter out the data.


Updating the Detail forms

Now that we have updated the main search form we may want to tweak some of the other forms as well. There are two other forms that have been added to this project, a detail form which is used to view the record, and then an edit form that is used to update and create new records within the Common Data Model.

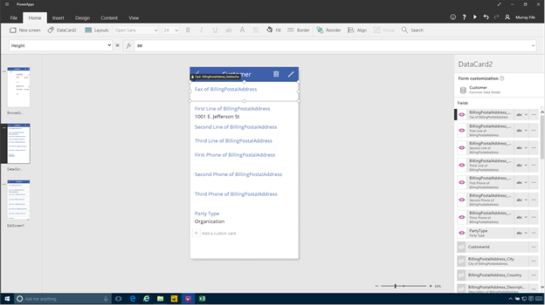
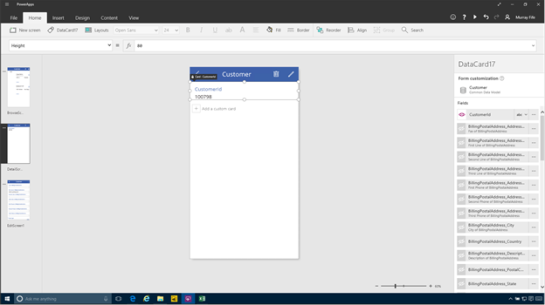
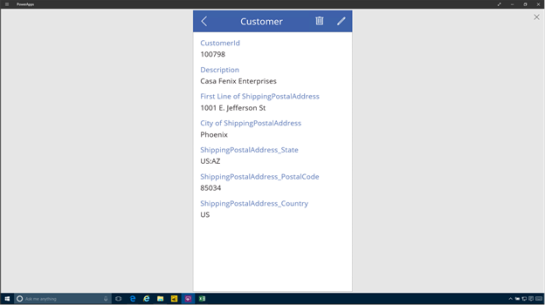
First we will update the Data page. To do this select the second PowerApp form. Here we will see that some of the fields have been added to the page, and if we select any of the fields then the fields that are included in the Data Card will show up on the right of the page.


Some will have an eye beside them to indicate that they are visible on the form. All of the other fields will be hidden.

In this case we don’t need any of those default fields to click on the visibility icon to toggle them off the form.


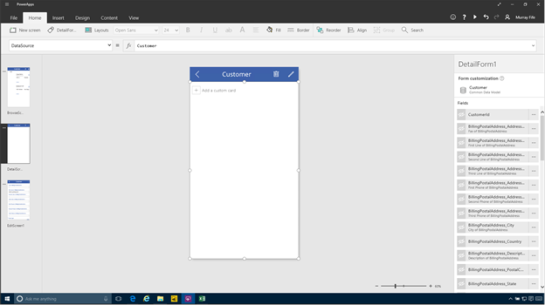
After doing that the form will be blank.


Now we will be able to find the fields that we really want and then toggle the visibility icon to add them back to the form.

Here we start off with the Customer ID.


Then we can repeat the process and add in some more fields to the form.


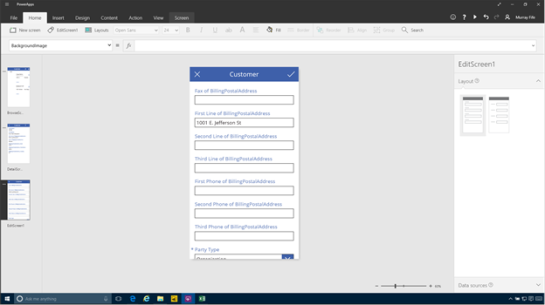
If we select the Edit card then we will see that there are a number of default fields that have been added as well.


If we select any of the fields then we will be able to see the same field editor as the previous form.


We can toggle the visibility on all of the fields that we don’t want to see.


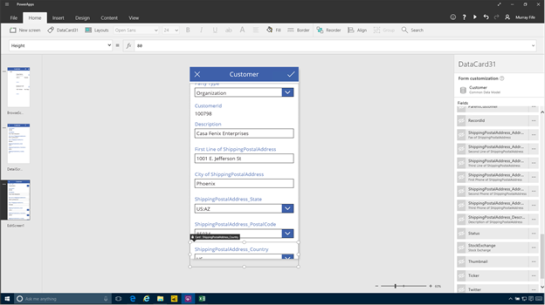
And then add in all of the fields that we do want to see and maintain on the form.


Updating Records within a PowerApp

Now that we have updated the Data and Edit cards we can try using the app again, but this time we can try updating some of the data within the Common Data Model.

Start off by previewing the app, then find a record that you want to maintain and then select it.


This will take us into the Detail card with all of the data from the record. To maintain the record all we need to do is click on the Pencil icon in the top right of the form.


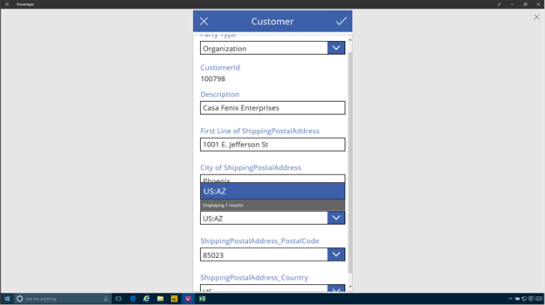
This will take us to the Edit card with all of the fields that we allow the user to maintain.


All of the fields that have lookups can be searched as well.

After we have updated the record, just click on the Check mark in the top right to save the record.


Adding new records within PowerApps

Now that we have updated records we can test out another feature which is the adding of new records. This will create new data within the Common Data Model for us as well.

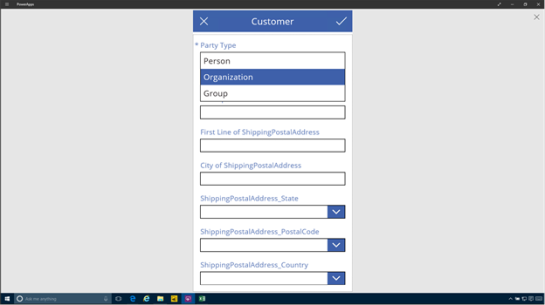
To do this we just return to the main card for the PowerApp that we created and then click on the + button in the top right hand corner.


This will take us to the Edit card for the PowerApp.


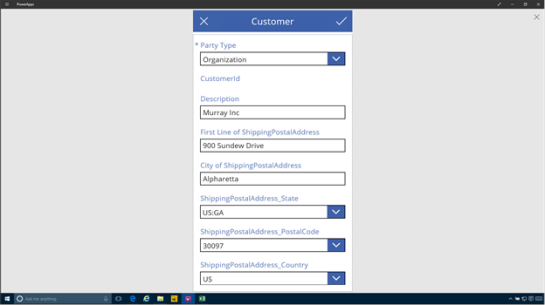
Now we can start updating the new record.


After we have added all of the data for the record we just click on the check mark in the top right hand corner of the app to save the record.


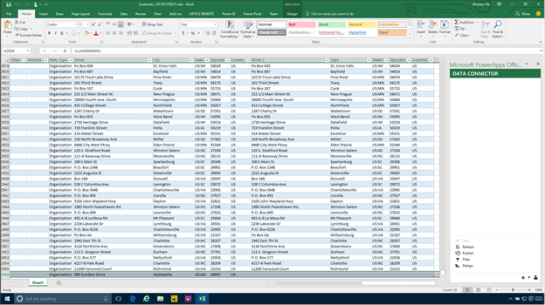
If we return to the Excel worksheet that has all of the data from the Common Data Model we can refresh the data and then scroll to the bottom of the form. We will see that there is a new record that matches the record we just added.


Also as we browse through the field we will see that all of the fields that we updated within the PowerApp form have been added to the record – i.e. the shipping address in this case.


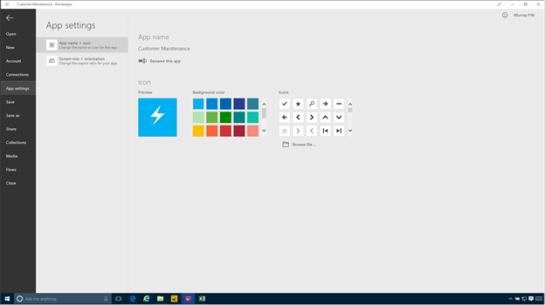
Sharing the Power App

Once we have created a PowerApp we chan share it with others within our organization.

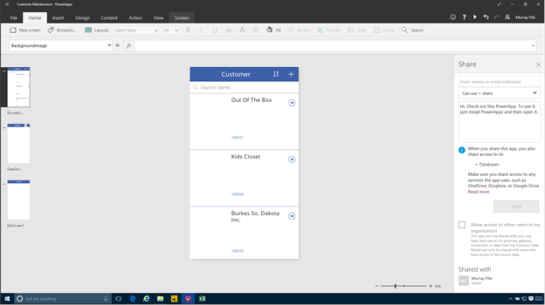
To do this, just click on the menu bar and we will be able to see a Share option. Just click on it.


This will open up a Share panel for us.


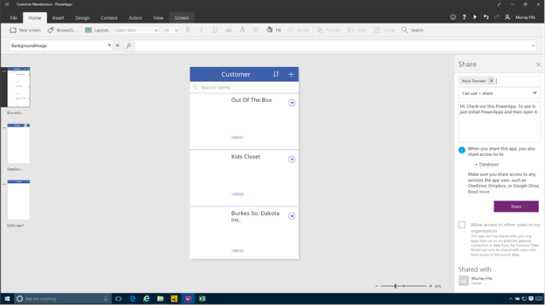
All we need to do here is type in the alias of the person within the organization that we want to share the PowerApp with and select their name from the dropdown list.


After we have selected all of the people that we want to share the app with, just click on the Share button.


Now it’s shared.


Using a Shared PowerApp

Once the PowerApp is shared the users will be notified that they have access to it and will then be able to consume the app in a number of different ways.

When we invite someone to the app they will receive an e-mail notification that they can start using it. They are able to access the app either through the PowerApp mobile app, or through a web browser.

To see the app within the Mobile App, just click on the Open inPowerApps mobile link in the e-mail.


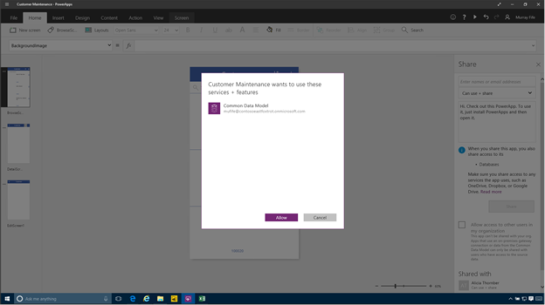
This will open up the PowerApps mobile application and confirm that you want to access the shared Common Data Model.


Then they will be able to browse all of the data and even update and add data through the app.


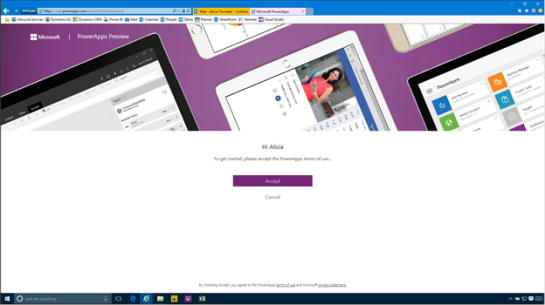
If they select the Web version then they will be taken to the PowerApps website and then confirm that they accept the Terms and Conditions.


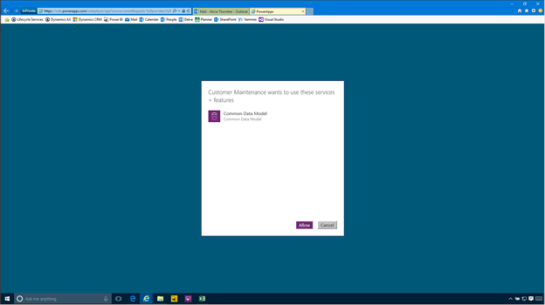
Then they will be asked to confirm that they want to access the Common Data Model again.


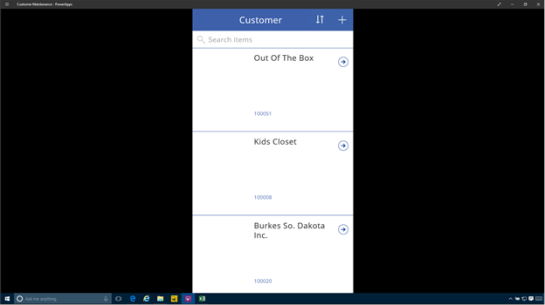
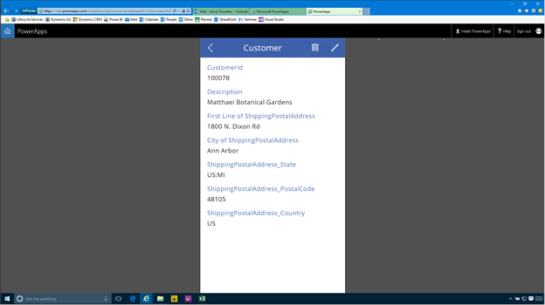
And then they will be able to access all of the data through the web interface as well.


Drilling into all of the detail the users are also able to see all of the same information as in the mobile app.


Conclusion

How cool is that!