Archive

Uncategorized

We all know that we can add Power BI tiles within Dynamics that will open up Power BI reports, but did you know that you can also link Dynamics workspaces and forms to Power BI tiles so that you can drill into Dynamics from Power BI.

You probably didn’t so in this walkthrough we will show how you can do just that.

How to do it…

Step 1: Click on the … link

To start off hover over the Power BI tile that you want to link back to Dynamics and you will notice that some extra icons show up in the header of the tile. Click on the link.


Step 2: Click on the pencil icon

This will open up some extra options for the tile. What we want to do here is edit some of the interaction information, so we will want to click on the Pencil icon.


This will open up the Tile Details form with some additional options that we can change just for the tile.


Step 3: Check the Set custom link flag

Now we will want to tell Power BI that whenever anyone clicks on the tile that we would like it to go to a different web page. To do this we will check the Set custom link flag.


Step 4: Get the URL

Now we will need to get the URL that we want to link the tile to. To do this we will open up Dynamics and find the workspace that we want to link to and then copy the URL.


Step 5: Set the Custom URL

Now paste the URL for Dynamics into the URL field and then click on the Apply button to confirm the change.


How it works…

Now we can return back to our dashboard and click on the tile that we just redirected.


And that will open up Dynamics for us and go straight to the workspace that we linked to it.


Review

How cool is that.

Now when you find some squirrelly data within your Power BI dashboards, you can immediately go back to Dynamics and research the problem a little more.

About the Author

Murray Fife is a Technical Solution Professional at Microsoft and an Author of over 25 books on Microsoft Dynamics AX including the Bare Bones Configuration Guide series of over 15 books which step the user through the setup of initial Dynamics AX instance, then through the Financial modules and then through the configuration of the more specialized modules like production, service management, and project accounting. You can find all of his books on Amazon at http://www.amazon.com/author/murrayfife.

Murray is also the curator of the Dynamics AX Companions (www.dynamicsaxcompanions.com) site which he built from the ground up as a resource for all of the Dynamics AX community where you can find walkthroughs and blueprints that he created since first being introduced to the Dynamics AX product.

Throughout his 25+ years of experience in the software industry he has worked in many different roles during his career, including as a developer, an implementation consultant, a trainer and a demo guy within the partner channel which gives him a great understanding of the requirements for both customers and partner’s perspective.

For more information on Murray, here is his contact information:

Email:     mufife@microsoft.com
Twitter:     @murrayfife
Facebook:     facebook.com/murraycfife
Google:     google.com/+murrayfife
LinkedIn:     linkedin.com/in/murrayfife
Blog:     atinkerersnotebook.com
Docs:     docs.com/mufife
Amazon:     amazon.com/author/murrayfife

With the release of Author Tools 1.0.1.13 we have done quite a bit to make the product better. We have added in a number of new features that make it even easier to author documents, we have made some small changes to existing functionality and of course we have fixed one or two bugs that we noticed along the way.

Here are the release notes that show you what we have done, with examples of the changes.

New Features

The first thing we will want to highlight with this release of Author Tools will be all of the new features that we have added. Because we use Author Tools ourselves, when we notice that there is something that annoys us, or a better way to do things, then we are sure that these will be features that bug you all as well, or that will make your life easier.

Here is a summary of what we have done to improve the tool.

Automatically show the Selection Panel

One of the changes that we are super excited about is that we now automatically show the Selection Panel whenever we add in a new slide from the Write ribbon bar. We are always watching the Selection Panel because it shows us all of the placeholder names, and when they get out of sync then Author Tools is not able to find the right content to put in the right area.

Up until now we have had to go into the Home ribbon bar and click on the Arrange dropdown list and then select the Selection Pane option for it to show up.

Although this is only a few clicks, after you have done it a few hundred times, it starts to get annoying.


Now if you use any of the insert buttons within the Write ribbon bar to add a slide and the Selection panel is not shown, it will automatically become visible.


New and Simpler Storyboard Template

We have made a lot of changes to the Storyboard template that we use as the basis for all of the documents, and have tried a lot of different formats and placeholders along the way. We now think that we have the ideal storyboard.

Some improvements that we have made include:

Simplifying the number of placeholder shapes within the slides so that we just have the information that is useful. i.e. Section slides do not have pictures, but have more space for text. We have removed some of the placeholders like Keywords etc. but you can still use them if you like, you just need to add the placeholder into your storyboard.

Added smaller, slide bookmarks, and also organized them from right to left based on the level they are in the document. We think this looks nicer.


Added a Rebuild Master Option

As we change the storyboard templates, one thing that has irked us is that all of our old storyboards still have the old format and don’t look as nice. So with this release we added an option to take an old storyboard and upgrade it to the newest format.

All that we need to do for this to work is to open up the Write ribbon bar and then click on the Rebuild Master button.


This will take all of the content from the old Storyboard and then move it over to the latest Storyboard that we have in the Themes directory.


Added a Split by Part/Chapter/Section/Article for Presentation

A few releases back we added a feature that would allow you to split the word documents into separate files based on the Part, Chapter, Section and Article. This is an easy way to create individual documents without having to manually cut and paste from a master file. We have been creating more and more presentations from our content and decided to add this feature into the Presentation section so that now when we build our PowerPoints they will be automatically split for us.

All we need to do is check the Split by xxx flag on the Publish ribbon bar and let the application do the rest for us.


Added a Reset Slide button

When the placeholder names get out of whack on the storyboard then Author Tools has a little bit of a hard time working out where the content it. We have had an option that will update the placeholder names when we built the documents, but sometimes we just want to update a slide by hand.

Now when we notice that the placeholders are not quite right, all we need to do is click on the Reset Slide button on the Write tab.


That will re-apply the slide template and also update the names. As an added benefit, all of the text formatting remains in place. When we did this by hand by resetting the slide, sometimes items that we had bolded or added other embellishments to lost their formats.


Added a Create Sections button

There has always been an option within Author Tools to automatically create sections based on the title of the slides, but it has been part of the Publishing process. With this release we added a button that allows us to create sections at any time without having to create a document or a presentation.

To do this, all we need to do is open up our storyboard and then click on the Create Sections button.


Author Tools will then add sections at every structure level within the storyboard. This is a great way to see the organization of the storyboard.


Added an option to load steps from Screen Shots

This is one of our most favorite changes that we added to the Author Tools, and this feature allows us to pull in all of the images from our Screenshots folder and have Author Tools create steps automatically for us. In the past we have had to have the Storyboard open as we have been creating our steps, take a screen capture and then paste it into the slide. Although this worked well, we realized that there was a better way to do things.

Now for every step that we are documenting we just press the Windows+Print Screen buttons. That takes a screen shot and placed the image in the Screenshots folder within the users Pictures folder.


Now if we just click on the Import Steps button, Author Tools will find all of the images within the folder and insert them in as steps for us automatically. All that is left is to narrate the steps.


Miscellaneous Changes

We have made some other changes along the way to make the tool easier to use. While not specifically bugs in the system, they are not really new features either, so we thought that we would point these out as well just so that you know that they are there.

Ignored hidden Shapes

The first item on the list was to have the tool ignore hidden shapes. Within PowerPoint we can hide shapes on the slide which is a great way to keep the content, but not necessarily show it when we publish it. With this release we just made sure that hidden shapes were ignored.

For example, if we start off with a Storyboard with some images, we can see on the Selection panel that all of the shapes are visible.


When we publish the document then all shapes including the pictures are inserted into the document.


If we want though we can hide any shape – for example here we hid a picture that was useful, but not necessary for the walkthough.


When we rebuild the document the image is not used.


Updated the Missing Style Error Message

When building a Word document, one of the most common errors that we come across is that the Word template does not have all of the necessary styles configured. It’s not a bug in the system, it’s really that we are just using an old or outdated template. A few releases back we “improved” the error messages by centralizing them in one routine, and as a result when the tool found that there was a missing style, it told us that it was missing, but didn’t tell us the Style Name so that we could update the template.

Now when there is a missing style, the message includes the name of the Style so that we can add it to the Word document and rebuild the document again.


Copy slide layout on Update Master

One small tweak that we made to the Update Master feature was to also update the Slide Layout to the master template as well. This means that the placeholders and formats became more consistent. Before this was added, it was really a twostep process to reset the slide and then update the master. Also this means that we don’t lose text formatting.

Removed Summaries from TOC

Another small change we made was to remove the Summaries from the Table Of Content slides. A small change, but a goodie.

Rearranged the Write ribbon bar

The Write ribbon bar has grown organically for the past couple of releases, and we thought that we should get it back under control and organize it a little better.

Now the Write ribbon bar is broken out into more logical groupings, including the breaking out of the insert slide options into the Structure group and the Content group. This makes it a lot easier to see the separation of the two types of storyboard slides.


Bug Fixes

The final section in these release notes will be all of the fixes that we have done. Although the tool is good, it has had its fair share of bugs, and we don’t think that these will be the last of them. But at least we have squelched these ones.

Fixed Certificate Error

A lot of people had problems installing the last release of Author Tools because it kept on coming up with a security error complaining about an invalid certificate. We finally worked out how to fix this and now everyone should be able to install the kit.

Fixed the Section and Article summary on presentations

We noticed that when we created a Presentation for the Sections and the Articles, if there is a Summary placeholder on the template then the summary was not being populated from the parent level – i.e. the Chapter etc. Now when we create the presentations, these slides pick up the parent level title and show them in the Summary placeholder.

Fixed the Slide Reset to check for the Design Name

We noticed that when we reset a slide, if the storyboard had two slide templates with the same name, but within different master groups then the first one was used. We now check for the Design name as well so that it will reset the slide to the right template slide.

Fixed the Presentation heading not showing with blank headings

You may not know this, but you don’t have to put headings on every slide. If you leave the heading blank, then it should inherit the title from the previous cell in the storyboard. Or at least that’s what we thought it was supposed to do. Now it does.

For example, in this Storyboard the first cell has a heading.


The subsequent cells do not have a heading.


When we create the Presentation the cells that did not have a heading just use the previous heading.


Review

We think that this release of Author Tools is the best one yet. We added a number of new features to the tool, we improved some of the old features to work better and we even fixed a few problems with the tool to make it work how we designed it to.

This release is now in the can and ready for shipping.

If you have it installed already then just update the tool and you are good to go.

If you don’t have the tool, then check it out here and try it out – the Student Edition is free and a great way to get your feet wet with the tool: http://www.dynamicsaxcompanions.com/collections/author-tools

With the Update 2 release of Dynamics, a new preview feature was made available within the product that allows you to create mobile applications for Dynamics directly through the application itself.

These mobile workspaces and forms will run in connected mode, will cache information and run in a disconnected mode, and also allow you to update data within Dynamics when connected, or disconnected as well (the disconnected updates occur when you regain your internet connection).

Although this feature has not been officially released, we can take a look at what it does right now and see how it works.

Enabling the Mobile Options

The first thing that we need to do is to enable the feature so that we can start seeing all of the mobile options that are available to us.

In order to do this, just add the following parameter to the end of the Dynamics URL:

&mode=mobile


This will add a new Mobile app option to the options menu.


If you click on the menu item, then a panel will show up on the right hand side that will allow you to start editing and creating new workspaces.


The second part of this feature is the mobile app itself. This is just another client for Dynamics and will run on Android, iOS, and I assume the Windows platform as well.

Luckily I have got a pre-release version so that we can see it in action.

Notice that the workspaces that were in the Dynamics Mobile manager form show up here as well.


Creating a new Mobile App

To create a mobile app, all we need to do is click on the + Add button within the Manage mobile app panel.


This will open up another screen where you will be able to define the main workspace for the app – which is the icon that shows up on the mobile device.


All we do here is enter in a Name and a Description.

If we want to we can also select a Workspace icon from the default icon list, and even the Workspace color.


Creating a Mobile App Page

Now that we have defined our app we can start adding pages to the app. To do this, just click on the Add page button.


This will open up a new page screen.


Enter in the Page title and the Page description.


Next we will want to select the fields that we want to show on the page. Before we do that though we will want to navigate to the form within Dynamics AX that we will be using as the template. In this case we are in the Customers form.

Once we have done that, just click on the + Select fields button.


This will turn on selection buttons within all of the fields that we are able to add to the form.


If we click on one (like the Account) then it will be added to the list of fields for the form.


We can continue adding fields until we are ready to move on. When we are finished, just click on the Done button.


This will return the form back to its normal state. To finish the form we just want to click on the Back button.


This will return us to the workspace form and we can see that our page has been added.


Adding a Detail Page

The app is pretty good right now, we will be able to scroll through all of the customers. But to make the app even better we will want to add a drill through page for the records that we show so that we can see even more information.

To do this we just need to select the main page that we just created and click on the Edit button.


This will return us to the details of the page, and if we select the Grid entry in the list of fields we will see that the Properties button becomes enabled.


If we click on the Properties button then a few more options will show up. We are interested in the Add Detail Page option here. We don’t have a page already built so we just need to click on the Add page link at the bottom pf the panel.


This will open up a new Page definition for us.


We just need to give the details page a Page name and a Page description.


Before we start selecting fields though let’s drill into a details page for the record so that we have more to work with and then click on the Select fields button.


Now we will see that all of the fields on the details form have the +option that allows us to add them to the mobile app.


All we need to do is click on one and it will be added to the list of fields.


We can add as many fields as we like and when we are done, just click on the Done button.


Adding a new Action

There is one last thing that we will want to do here, and that is to create an Action. Actions are things that do something, like adding a new record, deleting a record, etc. We can add these to the pages by stepping through them and the system will record our actions and clicks and build a script in the background for us.

To do this click on the Actions tab and then click on the + Add Action button.


This will open up an Action definition page.


Just enter in an Action name and an Action Description.

Then click on the + Select Fields button which will switch you into the record mode and we can start teaching Dynamics the action.

In this example we just click on the New button in the menu bar to create a new Customer.


Then we step through the process as if we were doing it in real life.


As we move from field to field we will see that the fields we update get added to the list of actions.


After updating all of the required fields we can click on the Save button for the customer.


This will return us back to normal edit mode within the mobile app and the action has been recorded for us.

Now we can just click on the back button to exit the action.


When we return to the detail page, just click on the Back button again.


This will take us back to the workspace and we can now click on the Done button.


Publishing the Workspace

Now that we have created the workspace we will be given an option to publish the workspace. To do it just click on the Publish workspace link.


Now when we return back to the main page we will see that we now have a new application that the users will be able to use.


How it works…

To see this in action, we can return back to the mobile app and we will see that we still don’t have the new workspace that we created.


All we need to do is pull down the form a little and let go to start the refresh back to the server.


Within a second or two we will see that we now have a new workspace that we can click on.


When we go into the workspace we will see the main page that we created, and we can click on it.


This will take us into the list page that we created, and because we have defined a detail page, we can also drill into the records by clicking on the > button.


Now we are in the detail form and we can see more fields. Notice down the bottom of the form though there is an Actions option. This shows up because we associated an action with this form when we designed it.


If we click on the Actions button it will show us the action that we defined earlier.


If we click on it we will be taken into the Add Customer page.


We can start updating the fields just like we would have within Dynamics.


Also notice that the dropdown boxes show us the valid values as well.


When we are done, just click on the Done button.


When we return back to the list page on the mobile app we will see that we now have a new record.


Also, when we return back to Dynamics we will see that there is a new record in there as well – which makes sense because the Mobile app is just another way of updating Dynamics.


Review

This new feature enables us to turn pretty much any form within Dynamics into a mobile form, without refactoring any of the base code, and also without writing a single line of code.

If you ask me, that is pretty darn cool.

About the Author

Murray Fife is a Technical Solution Professional at Microsoft and an Author of over 25 books on Microsoft Dynamics AX including the Bare Bones Configuration Guide series of over 15 books which step the user through the setup of initial Dynamics AX instance, then through the Financial modules and then through the configuration of the more specialized modules like production, service management, and project accounting. You can find all of his books on Amazon at http://www.amazon.com/author/murrayfife.

Murray is also the curator of the Dynamics AX Companions (www.dynamicsaxcompanions.com) site which he built from the ground up as a resource for all of the Dynamics AX community where you can find walkthroughs and blueprints that he created since first being introduced to the Dynamics AX product.

Throughout his 25+ years of experience in the software industry he has worked in many different roles during his career, including as a developer, an implementation consultant, a trainer and a demo guy within the partner channel which gives him a great understanding of the requirements for both customers and partner’s perspective.

For more information on Murray, here is his contact information:

Email:   mufife@microsoft.com
Twitter:   @murrayfife
Facebook:   facebook.com/murraycfife
Google:   google.com/+murrayfife
LinkedIn:   linkedin.com/in/murrayfife
Blog:   atinkerersnotebook.com
Docs:   docs.com/mufife
Amazon:   amazon.com/author/murrayfife


Dynamics has a neat feature that allows us to create templates from pretty much any record within the system that will then be used when creating new records. It works great, but the trick with this feature is knowing where the feature is hiding because it is not hiding in plain sight.

How to do it…

To create a record template all we need to do is select the record that we want to use as the template and then click on the Record Info link within the Options action bar.


When the Record Information panel is displayed, we will see that there are two buttons at the bottom of the form for creating new templates.

The Company Accounts Template option will allow you to create a template that will be available to everyone within the organization.

The User Template option will allow you to create a private template that only you have access to.

In this case we will click on the Company Accounts Template button to create a global template.


This will open up the Create Template panel.


All we need to do here is assign our template a Name and then give it a Description that will help the users understand what the template does and when they should use it.

After we have done that we can just click on the OK button to save the template.


When we return back to the Record Information panel, we can click on the Close button to exit from the form.


How it works…

Now when we create a new record, we will be asked if we want to use a template. We can use the default Blank template if we like.


Or we can select any of the other templates that we have created and then click on the OK button.


Now when we start setting up the new record we will see that all of the main codes have been defaulted in from the template record.


Also for the larger records like the Customers table we will also see that a lot of the sub codes have already been populated for use.


If we spend a little more time creating some more templates then we will be able to save a lot of time.


Review

Creating record templates is a great way to save time when setting up new records within Dynamics because we don’t have to worry about all of the specific flags and codes that we need to configure for specific groups of records. Also this is a way that we can help new users set up data correctly by giving them optional template formats.

About the author

Murray Fife is an Author of over 25 books on Microsoft Dynamics AX including the Bare Bones Configuration Guide series of over 15 books which step the user through the setup of initial Dynamics AX instance, then through the Financial modules and then through the configuration of the more specialized modules like production, service management, and project accounting. You can find all of his books on Amazon at http://www.amazon.com/author/murrayfife.

Murray is also the curator of the Dynamics AX Companions (www.dynamicsaxcompanions.com) site which he built from the ground up as a resource for all of the Dynamics AX community where you can find walkthroughs and blueprints that he created since first being introduced to the Dynamics AX product.

Throughout his 25+ years of experience in the software industry he has worked in many different roles during his career, including as a developer, an implementation consultant, a trainer and a demo guy within the partner channel which gives him a great understanding of the requirements for both customers and partner’s perspective.

For more information on Murray, here is his contact information:

Email:
mcf@dynamicsaxcompanions.com
Twitter:
@murrayfife

Facebook: facebook.com/murraycfife
Google: google.com/+murrayfife
LinkedIn: linkedin.com/in/murrayfife

Blog: atinkerersnotebook.com

Docs: docs.com/mufife
Amazon: amazon.com/author/murrayfife

The expense management within Dynamics allows the users to easily submit expense, but a lot of the time they are just copying information from corporate credit cards which the organization is already receiving summaries for. To save time, and also to make sure that some of the transactions don’t get lost, it’s a good idea to automatically import the transactions beforehand and then just get the employees to expense the unreconciled expenses.

Luckily Dynamics allows is to do that.

Getting Ready…

Before we start importing our credit card transactions we need to first set up the employee with a credit card that will be used to link the imported transactions to the employee record.

To do this open up the Employee record and then open up the Expense action panel. Then click on the Credit cards link.


This will open up the Credit Card maintenance form for the employee. Here we will just want to click on the + New button in the menu bar.


This will create a new record for us.


Now we just need to find the credit card number from the import file.


Once we have pated in the credit card number into new record we can update the Payment Method and set it to CreditCard.


We then can identify the credit card by updating the Description.


And then set the Card type – in this case AMEX.


Now we will want to import in all of the credit card transactions from the import file. To do this, just click on the Credit card transactions link within the Periodic tasks group of the Expense management menu.


When the Credit card transactions form is displayed, click on the Import transactions button within the menu bar.


This will open up the Data Management form.


All we have to do here is give our import a unique Name.


Then select the Source data format and set it to Package.


Then click on the Upload button and find the credit card import file that we want to use and then click on the Open button.


This will process the file and when it has finished, just click on the Import button within the menu bar.


This will kick off the import transaction.


After a bit the process will complete and you will see if any of the transactions failed to import.


When we return back to the Credit card transactions we will see that there are a number of new transactions that have been added.


How it works…

Now we can see the results of the import. To do this we will just open up the Employee Self Service workspace and then click on the New report option within the Expenses section.


We will just need to give our expense report a Purpose and a Location and then click on the OK button.


Rather than go straight to the expense report, since there are outstanding transactions, then the Add unreconciled expenses form will be displayed showing us all of the transactions that we just uploaded.


We can select any of the transactions that we want to add to our expense report, set the Expense Category for each of the transactions.

After we have done that we can click on the Continue button.


Now when the Expense report is displayed it will already have the imported transactions there for us.


Review

Importing the transactions from the credit cards into Dynamics is a great timesaver. Also before importing the transactions we can also merge in information from other systems to speed up the process.

How cool is this.

About the Author

Murray Fife is an Author of over 25 books on Microsoft Dynamics AX including the Bare Bones Configuration Guide series of over 15 books which step the user through the setup of initial Dynamics AX instance, then through the Financial modules and then through the configuration of the more specialized modules like production, service management, and project accounting. You can find all of his books on Amazon at http://www.amazon.com/author/murrayfife.

Murray is also the curator of the Dynamics AX Companions (www.dynamicsaxcompanions.com) site which he built from the ground up as a resource for all of the Dynamics AX community where you can find walkthroughs and blueprints that he created since first being introduced to the Dynamics AX product.

Throughout his 25+ years of experience in the software industry he has worked in many different roles during his career, including as a developer, an implementation consultant, a trainer and a demo guy within the partner channel which gives him a great understanding of the requirements for both customers and partner’s perspective.

For more information on Murray, here is his contact information:

Email:
mcf@dynamicsaxcompanions.com
Twitter:
@murrayfife

Facebook: facebook.com/murraycfife
Google: google.com/+murrayfife
LinkedIn: linkedin.com/in/murrayfife

Blog: atinkerersnotebook.com

Docs: docs.com/mufife
Amazon: amazon.com/author/murrayfife

Power BI has a pretty cool option that allows you to specify that a field within your report is a URL to an image file. This allows us to add images to our reports based on the data that we are showing, giving our reports a little more pizazz and also makes the data a little more relatable by the users.

Even if there are no images within the data that you are reporting on, you can easily mash up images from other web sites like SharePoint into your Power BI reports.

In this walkthrough we will show you how you can do this by incorporating product images stored within SharePoint into a simple product dashboard.

Getting Ready…

Within Dynamics we can store our product images against our products. But this is not very accessible through Power BI.


So to get around this problem we have created a curated site within SharePoint that is accessible by all of the users where we have saved away all of our product images.

Each of the images has been given a file name which is the same as the product number.


This will allow us to access the product image through a URL by specifying the part number within the URL.

We will see why this is useful in just a couple of slides.


How to do it…

To start off, lets create a new Power BI report. To do this, just open up Power BI Desktop and then click on the Get Data menu item on the splash screen.


When the Get Data selection form is shown, click on the Other data source types and then click on the OData Feed option. Then click on the Connect button.


When the OData Feed configuration dialog is shown, we just need to paste in the URL for our Dynamics tenant and then add /data to the end. Then click on the OK button.


Within a few seconds, Power BI will connect to the OData feed and return back with all of the entities that we can report off.


Filter down the list of entities until you can see the ReleasedDistinctProducts entity, select it and then click on the Load button.


This will return you to the reporting designer and we will see that we now have a table that we can report off.


But we don’t have a URL that we can use as an image yet. We need to modify our query a little to get this working.

Start off by clicking on the Edit Queries button and then click on the Edit Queries submenu.


This will open up the query editor with all of our fields in the data source.


Switch to the Add Column ribbon bar and click on the Add Column button,


This will open up the Add Custom Column dialog box and we can start creating a new field that will point to our images within SharePoint.


Start off by updating the New Column Name to something a little more descriptive – like ProductImage.


Then enter in the formula that you want to use to create the field contents.

For example, here we just create a string using the URL for our SharePoint site as the base URL, and then insert the Product Number field.

https://contosoeastfoxtrot.sharepoint.com/Product%20Images/LEGO/” & [ProductNumber] & “.jpg”

Then click on the OK button.


The next thing that we know we will have a field that we can use within our report that points to our product images.


Now that we have created the field we can just click on the Close and Apply button to update the query.


There is one last step though that we need to do before we can start using the image within the report, and that is to tell the system that the field is an Image URL and that it should show the field as an image rather than as the URL string.

Start off by switching to the table data view within Power BI Desktop and then select the new field that we created.


Now switch to the Modelling tab within the ribbon bar. Within the Properties section there is a selection field called Data Category that we use to manipulate how the fields get displayed.


If we click on the dropdown list we can select the Image URL category to tell the system to display it as an image.

After we have done that we are ready to start using it.


How it works…

Now we can just add in the ProductImage field into our dashboard.

But, you are probably saying, the images are not showing.

The images unfortunately don’t show on the Desktop Designer.


But they do show up on the Power BI Online version. So all we need to do is click on the Publish button and then save the new dashboard that we created to PowerBI Online.


Now when we look at the report within PowerBI Online we will see that our images start showing up on our reports.


Review

We can use images a number of different ways to add a little context to our reports. For example, we could use them for different groups of data like customer groups, or geographic segments. We can also use the images within filters and also data cards to help make the information a little more interesting.

All we need to do is create the image repository.

How cool is that!

About the Author

Murray Fife is an Author of over 25 books on Microsoft Dynamics AX including the Bare Bones Configuration Guide series of over 15 books which step the user through the setup of initial Dynamics AX instance, then through the Financial modules and then through the configuration of the more specialized modules like production, service management, and project accounting. You can find all of his books on Amazon at http://www.amazon.com/author/murrayfife.

Murray is also the curator of the Dynamics AX Companions (www.dynamicsaxcompanions.com) site which he built from the ground up as a resource for all of the Dynamics AX community where you can find walkthroughs and blueprints that he created since first being introduced to the Dynamics AX product.

Throughout his 25+ years of experience in the software industry he has worked in many different roles during his career, including as a developer, an implementation consultant, a trainer and a demo guy within the partner channel which gives him a great understanding of the requirements for both customers and partner’s perspective.

For more information on Murray, here is his contact information:

Email:
mcf@dynamicsaxcompanions.com
Twitter:
@murrayfife

Facebook: facebook.com/murraycfife
Google: google.com/+murrayfife
LinkedIn: linkedin.com/in/murrayfife

Blog: atinkerersnotebook.com

Docs: docs.com/mufife
Amazon: amazon.com/author/murrayfife

Creating mobile apps for Dynamics has never been an easy task in the past because they have always required developers and a lot of coding. And then having to integrate the app that you create is another story, requiring even more coding and developers. Creating a mobile app has not been something that you normally want to take on unless there is a huge need, and usually a hefty budget.

But, with the introduction of the PowerApps platform that changes a little. Now we can create mobile apps that use a new feature called the Common Data Model by using the PowerApps designer, and then trigger updates to Dynamics through another new tool called Flow. All of this is possible with just a little bit of work, and also no development or coders required.

In this walkthrough we will show how you can do this without breaking a sweat.

Accessing the Contact Table in the Common Data Model

In order to create an application we need to have somewhere to store all of the data. For this example we will use the Common Data Model Entities as the staging area for our contacts and then have them trigger events to update the data within the other subsystems of Dynamics.

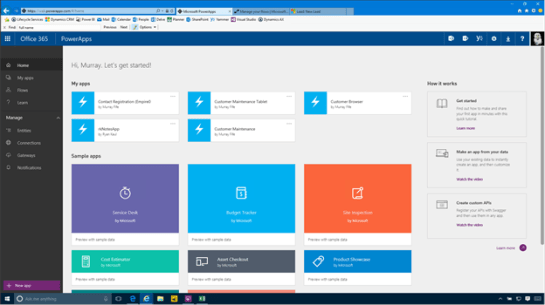
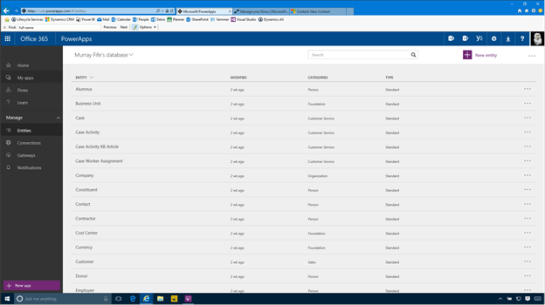
To see all of the tables (including the Contact table) all we need to do is open up the PowerApps portal, and then click on the Entities link in the menu bar.


This will open up a list of all the entities that are available. In this case, these are all of the entities that are created when the Common Data Model database was created for us.


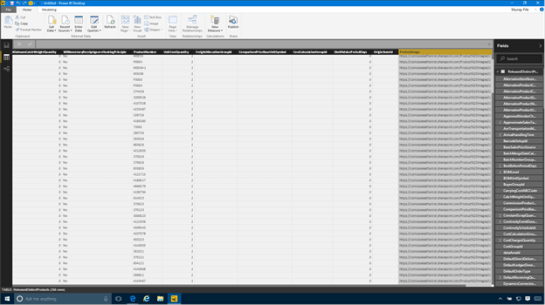
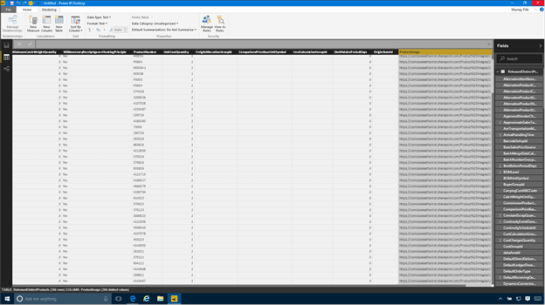
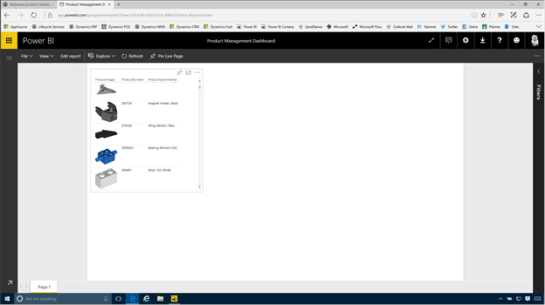
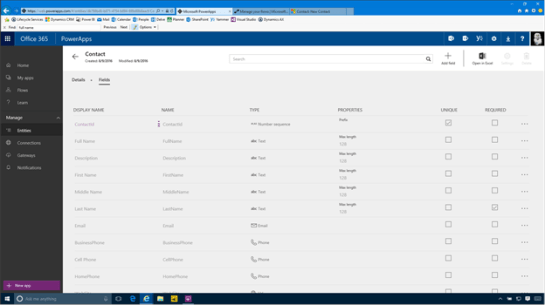
If we drill into the Contacts entity then we will be able to see all of the standard fields that are available for us to use within our applications.

In the top right hand corner is a link that allows us to Open in Excel.


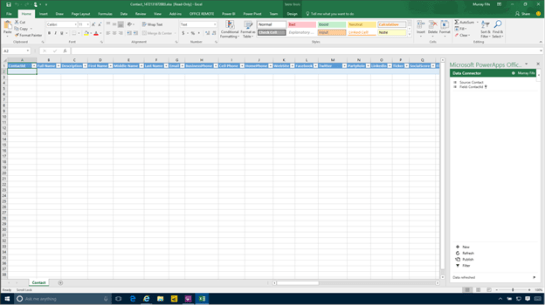
If we click on that it will open up the table in Excel and allow us to maintain the data that is in there, and also see as new records are created. We will leave this open for now because it will allow us to see the data records as we create them in the next step.


Creating Our Registration PowerApp

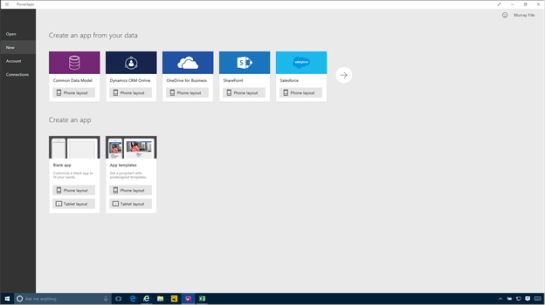
Now we will start creating our PowerApp mobile application. For this example we will use the PowerApps desktop version which we downloaded from the Microsoft Store.

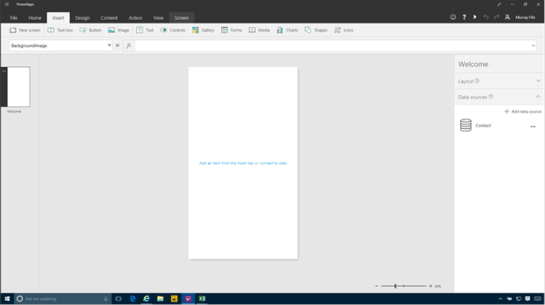
All we need to do to start creating our app is to click on the Phone Layout link within the Blank app section of the Create an app group.


This will open up the PowerApps canvas where we can start building our application.


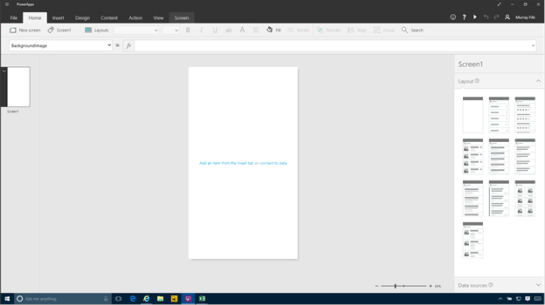
Rename the first screen

The initial application will only have one screen that we will start configuring. Later on we will add another screen that we will call from here, but before we do that, let’s make a quick change.

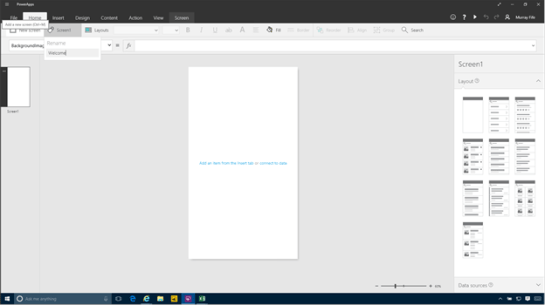
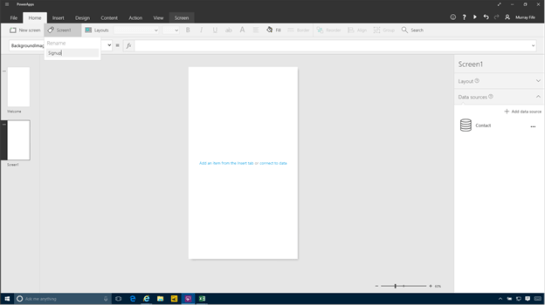
If we select the Screen1 page, and then look within the Home ribbon bar, we will see a button there with the same name. If we click on this button, a rename option will show up and we can change the name from the default name to something a little more useful. In this case we will set it to Welcome for the Welcome screen.


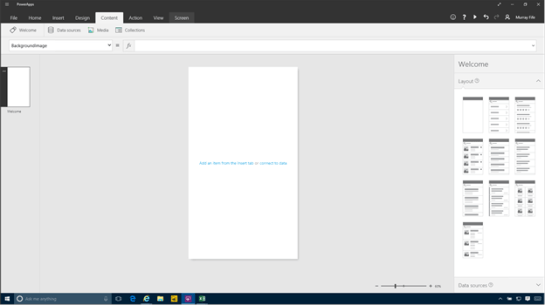
Adding a Connection to the Common Data Model Entity

The next thing that we will want to do is to connect the application to the table within the Common Data Model. To do this all we need to do is click on the Content ribbon bar and we will see that there are a couple of options available for us.

In this example we will want to click on the Data sources button.


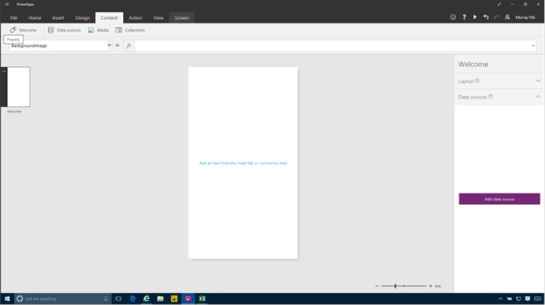
This will open up a panel on the right where we will define all of the data sources that we want to use in this application.

To add a data source, all we need to do is click on the Add data source button.


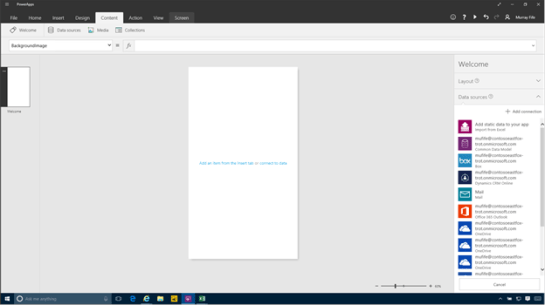
This will open up a number of different data source options for us. The one that we are interested in this example though is the one that is linked to our Common Data Source (the second one down in the list). All we need to do is click on it.


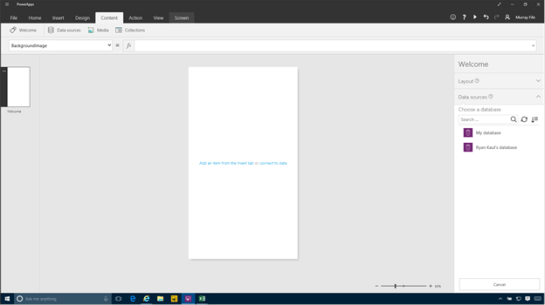
Then we will be asked which Common Data Model that we want to use. In this case we have a couple of different models, but I want to connect to the My database.


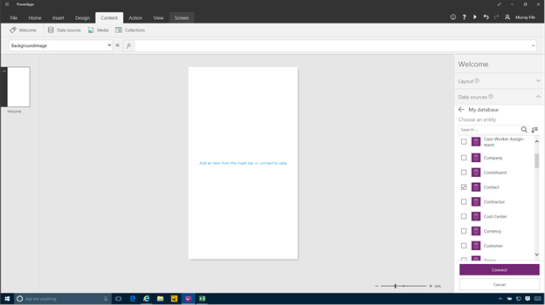
This will then open up all of the Entities that are available for us to connect to our application. Here we will want to select the Contact entity and then click on the Connect button.


Now we have a data source that we can use in our application.


Creating additional Pages

For this application we are going to start with a Welcome page with a link that then allows people to create new records within the Common Data Model entities. So the next step in the process is to add a second screen. To do this, click on the Insert ribbon bar, and then click on the New Screen button.


This will create a second screen for us.


We will change the name of the new screen from the default name to Signup.


Adding a Editable registration form

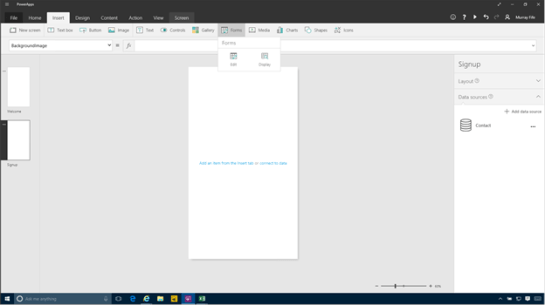
Now we will want to add a way for the users to add records into the table. To do this we will want to click on the Forms button within the Insert ribbon bar and then click on the Edit button.


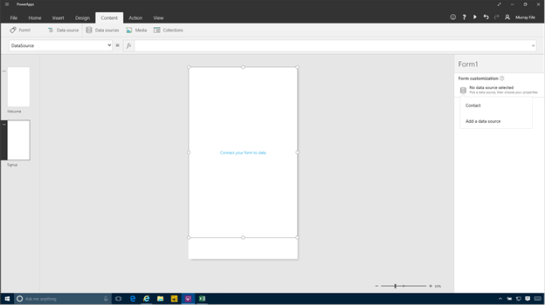
This will add a new form onto the page. But it is not connected to any data source yet. To fix that, click on the No data source selected link on the right and we will see that our Contact data source is available for us to select from. Let’s do that.


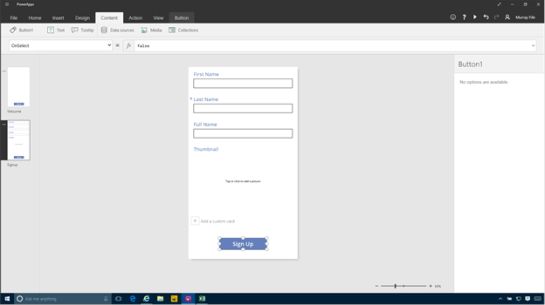
After selecting the data source we will see all of the fields that we can add to our form. Right now none are selected though.


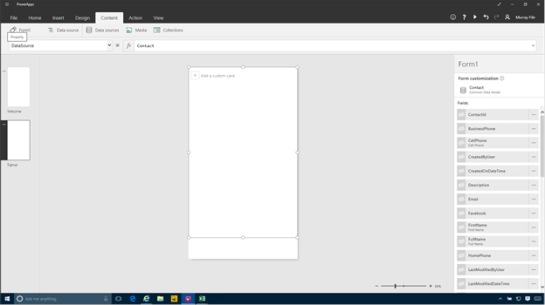
All we need to do is click on the eye icon beside the field to toggle them from hidden to visible.

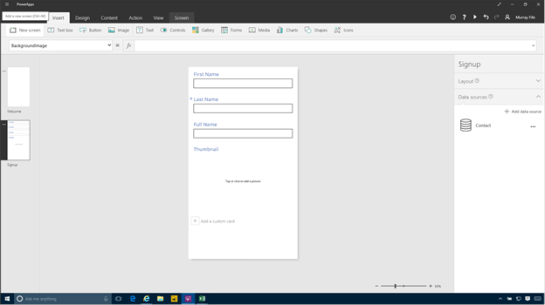
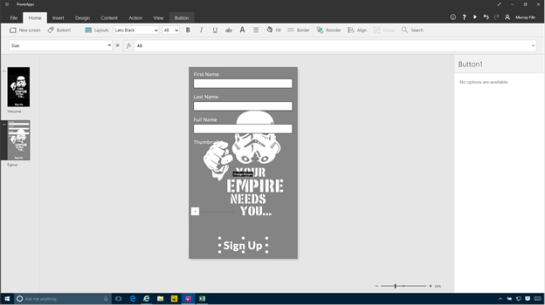
Here we added the following fields:

First Name

Last Name

Full Name

Thumbnail

This will allow us to get our recruit details and also a picture for reference.


Adding some navigation buttons

Now that we have created our edit form, we will want to add some buttons to control the navigation within the form.

We will start off by adding a button to submit the sign up details for the form. To do this we just click on the Button button within the Insert ribbon bar.


This will add a new button to the Signup form.


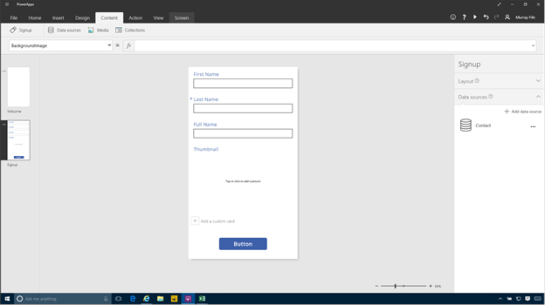
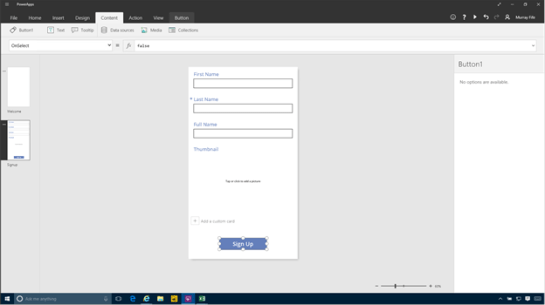
We will want to change the name of the button a little. To do that we just double click on the button and then we can edit the text and change it to Sign Up.


We will also want a button on the welcome page to click in order to open the record details page. So we can just copy the button from the Signup page and paste it into the Welcome page.


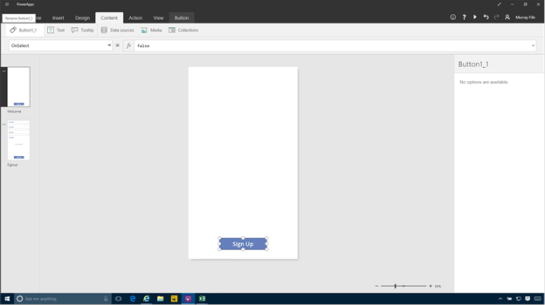
Creating a New Record action

Now we will want to make our button do something. If we click on the button, then we will notice that the events will show up as a dropdown list underneath the ribbon bar. We will want to select the OnSelect event to create an action whenever the button is clicked.

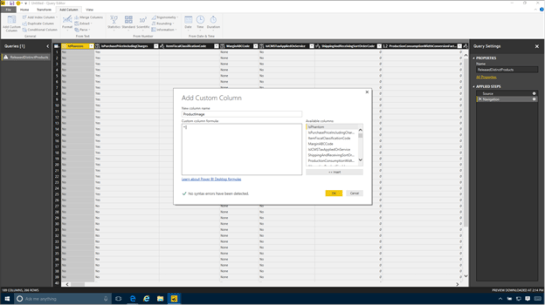
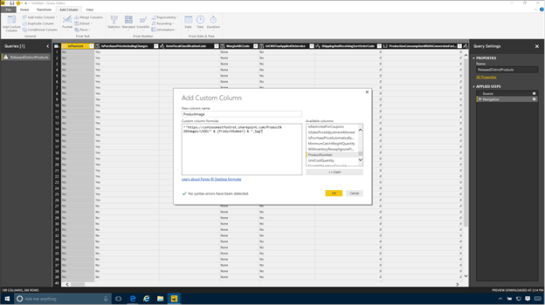
Now we want to say what the action is that we want to perform. Within the fx field type in:

NewForm(Form1)

This says that when we click on the button, create a new record in Form1, which is our edit form within the Signup page.


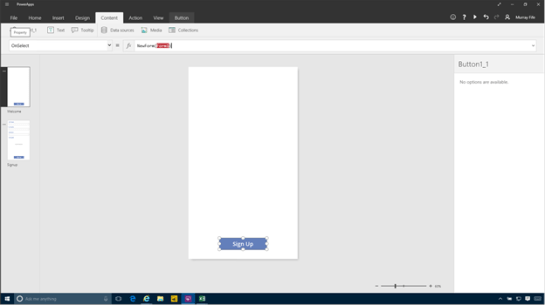
But we don’t want to stop there. We need to also switch pages and navigate to the Signup page for someone to enter in their details. So we will add the following to the end of the function:

;Navigate(Signup,ScreenTransition.None)

This tells the system to navigate to the Signup screen and then have no transition effects.

Also. note the ; which separates the two commands.

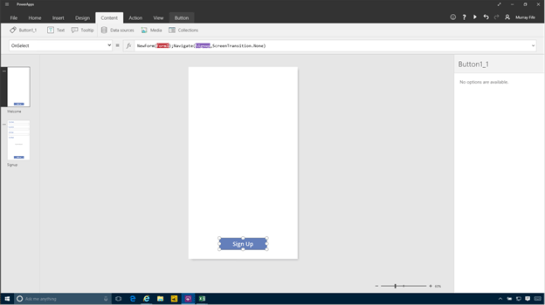
The final command should look something like:

NewForm(Form1);Navigate(Signup,ScreenTransition.None)


Creating a Save Record action

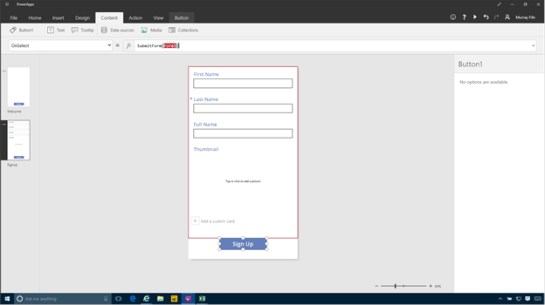
Now we will want to create an action that allows the users to save their signup information after they have filled out the form. To do this we will swap to the Signup form, select the Signup button and then select the OnSelect action.


For this action we will want to submit the form to the database. So within the fx editor start by adding the following command:

SubmitForm(Form1)

This will submit whatever is in the form to the Common Data Model.


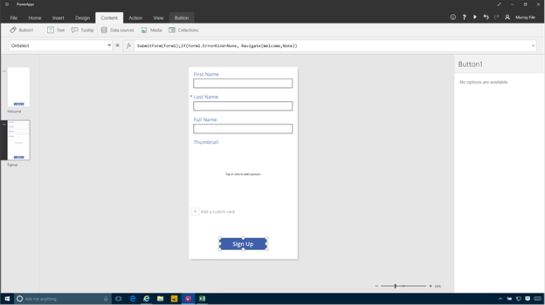
We are not quite finished though. If there are no errors in the form then we will want to return back to the welcome screen. So we will want to add the following action:

;If(Form1.ErrorKind=ErrorKind.None, Navigate(Welcome,ScreenTransition.None)

This tells the system to check for an error and if there isn’t one then return back to the welcome screen.

The full action is:

SubmitForm(Form1);If(Form1.ErrorKind=ErrorKind.None, Navigate(Welcome,ScreenTransition.None)


Taking the form for a test drive

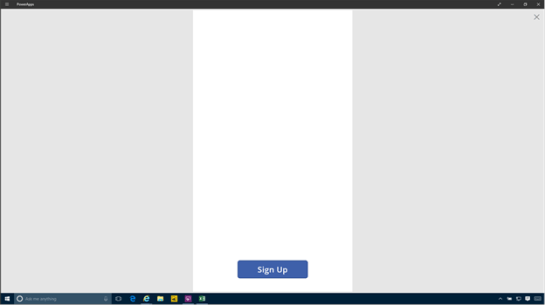
Now that we have created our application we can take it for a spin. To do this, click on the Welcome form and then click on the Play icon in the menu bar in the top right hand corner of the designer.


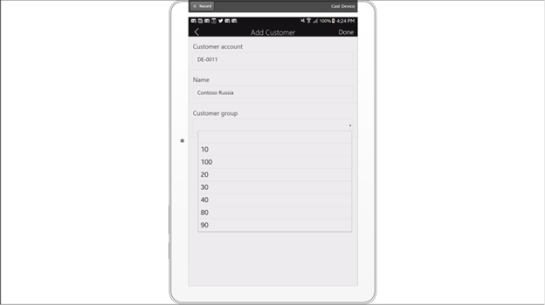
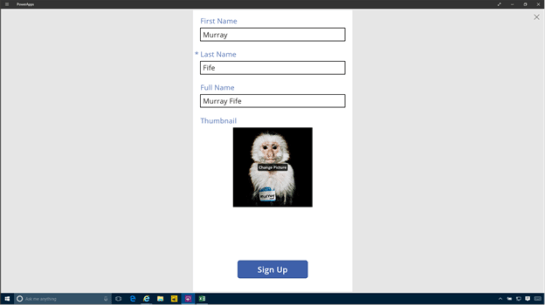
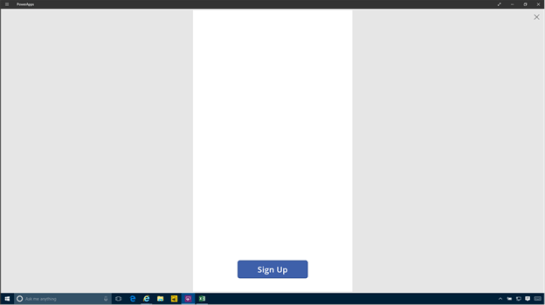
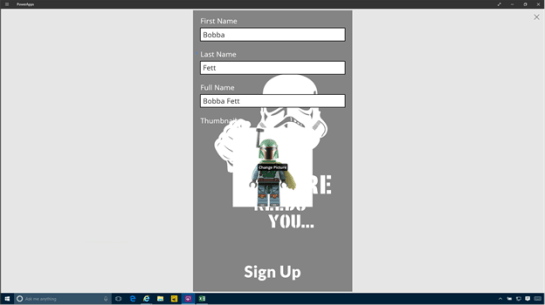
This will open up the form as if it were a real app, and we will be on the Welcome screen with the sign up button. All we need to do is click on it.


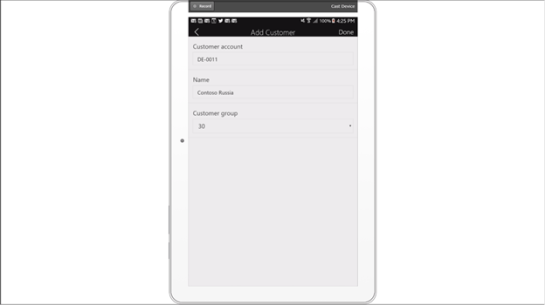
This will open up the Sign up form and we can fill in all of our details and add a picture before clicking on the Sign Up button to submit the record to the common data model entity.


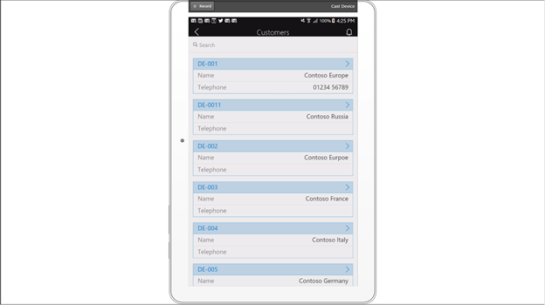
If everything goes well then we return back to the main form.


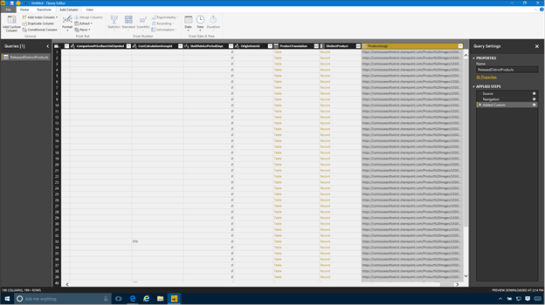
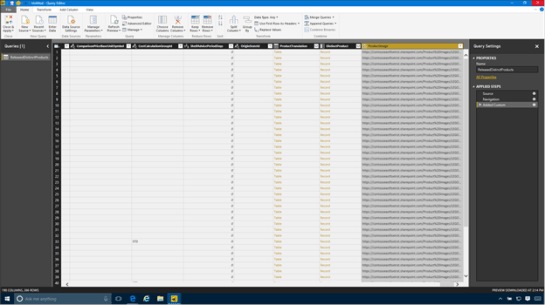
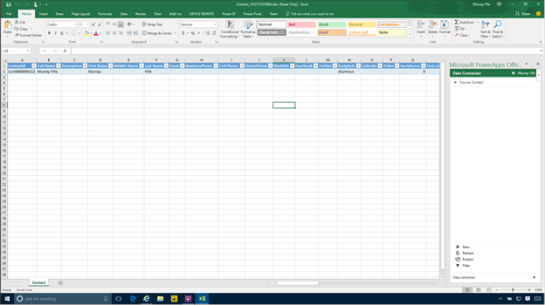
If we return to our Excel file that is linked to the Contacts entity and click on the Refresh button we will see that a new record has been added to the form.


Embelishing the PowerApp Forms

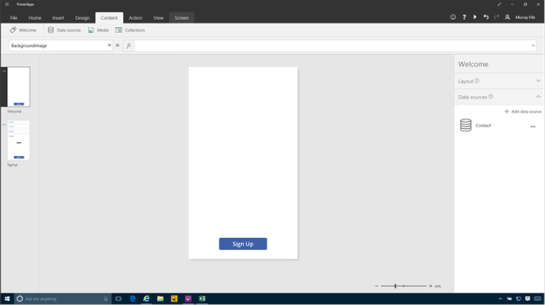
The application that we just created is pretty functional as it is and would work perfectly well out in the field, but it is a little boring. So we will want to embellish the form a little. The first thing that we will do is add a background image to the form.

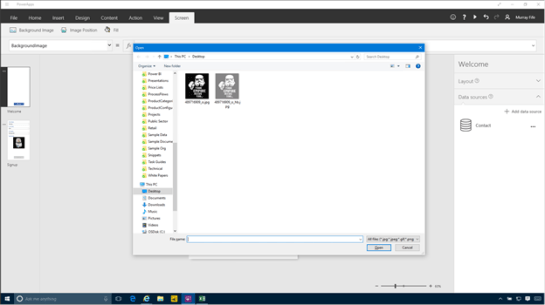
To do this we will select the page and then click on the Screen ribbon bar. Then click on the Background button and select the Add an image file option.


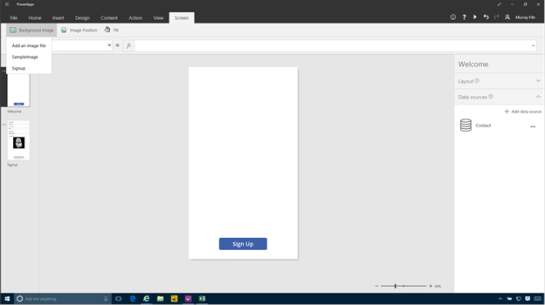
This will add open up the file explorer and we can select a background that we want to use on the form.


Then we can change the background fill to make it match the image.


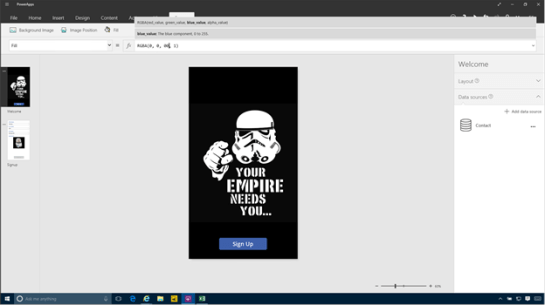
Finally we will change the button to make it look less like a button by removing the border and fill and then changing the font a little.


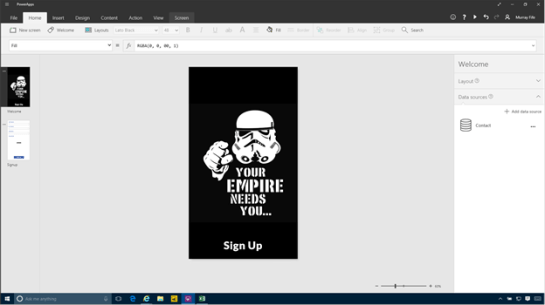
Then we repeat the process for the Sign Up form, and make sure that all o the labels look nice.


Creating a Flow to update Dynamics

Now that we have our recruitment form all set up and are capturing the information within the Common Data Model Entity we will want to start doing things with it. To do this we will take advantage of Flow which will watch for information changing within the entities and then allow us to update other systems including Dynamics.

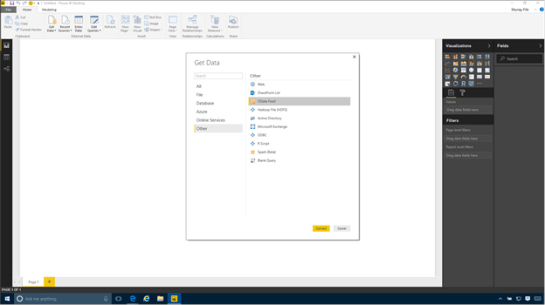
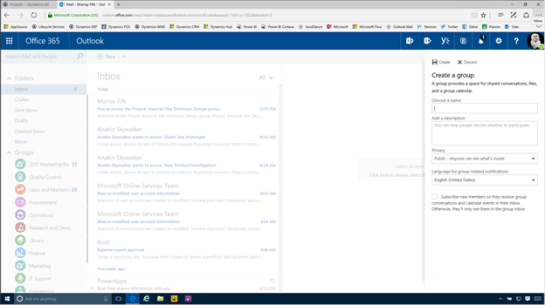
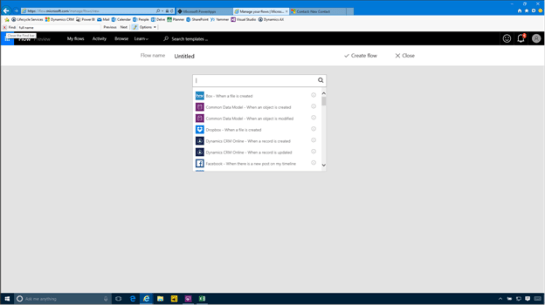
To do this we will open up Flow and then click on the Create from blank button.


This will create a new Flow template for us, and the first thing we need to do is select the event that we want to use to trigger the flow. If we click on the search field then we will see that there are a number of different options including the Common Data Model – When an object is created trigger.


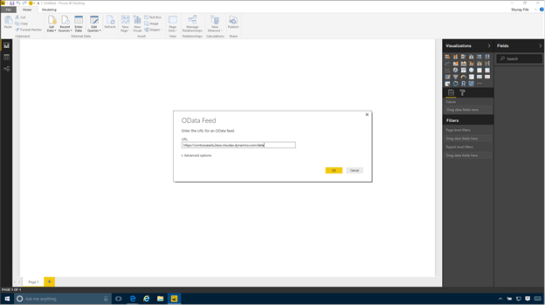
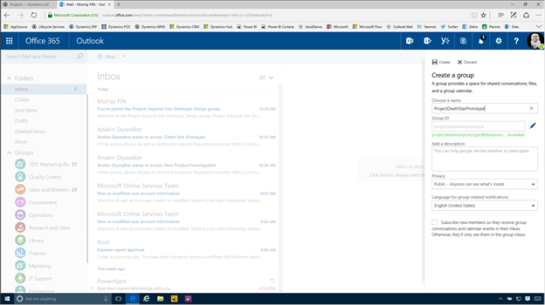
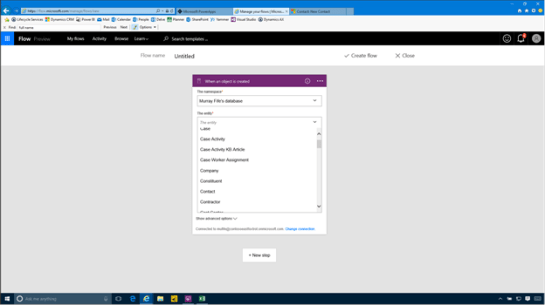
After we have selected that trigger then we will see a couple of configuration fields that we need to specify.


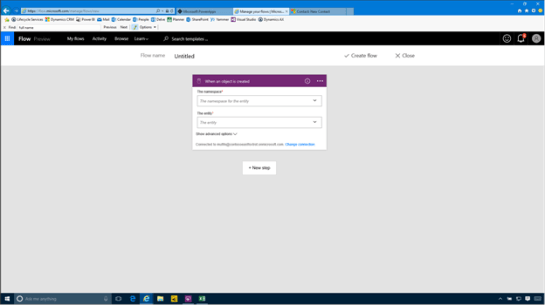
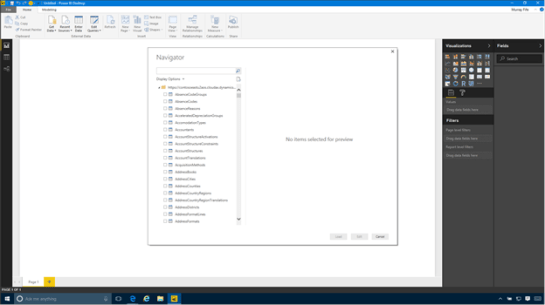
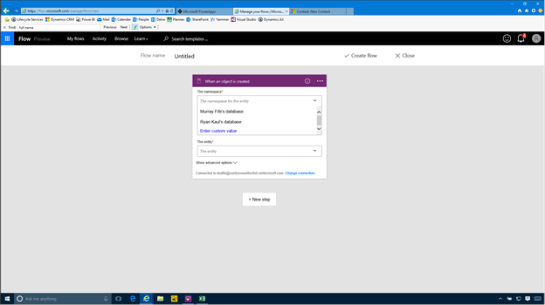
When we click on the Namespace option we will be able to select the Common Data Model database that we want to watch.


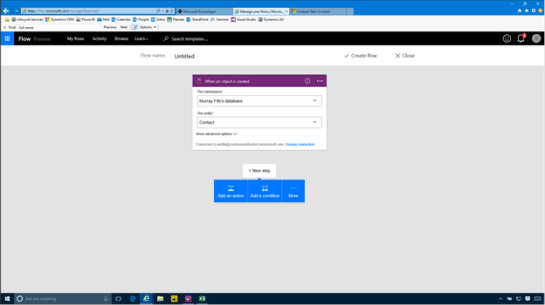
And then we can select the Entity that we want to watch, which in this case is the Contact entity.


Adding a new Action to create a Contact in Dynamics

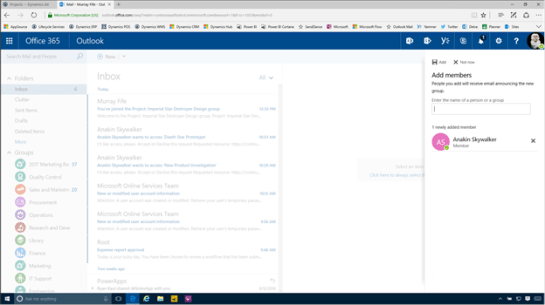
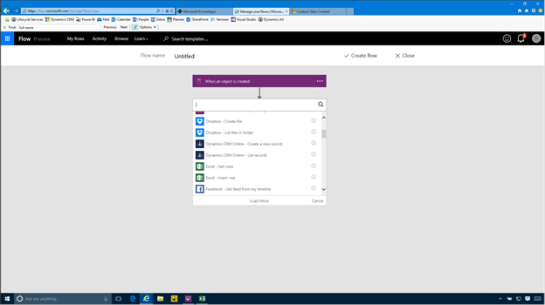
After we have done that we can click on the New Step button and then select the Add Action button to add a new cation that gets performed when a new contact is added.


When the search box is displayed we can search through all of the actions that are available to us. These are different from the triggers and we can scroll down and find the Dynamics CRM Online – Create a new Record option.


Now we need to link the action to our CRM instance.


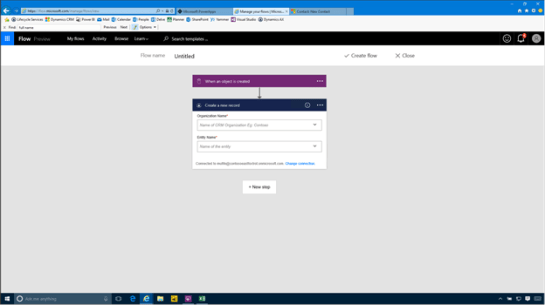
If we click on the Organization Name dropdown we will see that our CRM instance is available to us.


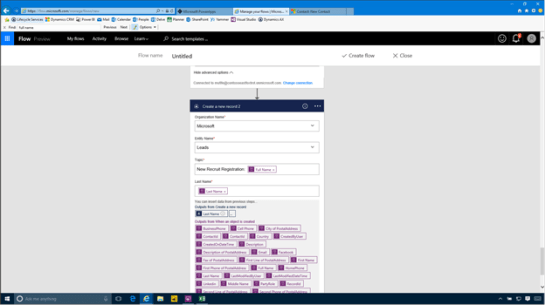
And then we can click on the Entity Name dropdown and select the Contacts entity from CRM.


This will then show us some more fields to update.


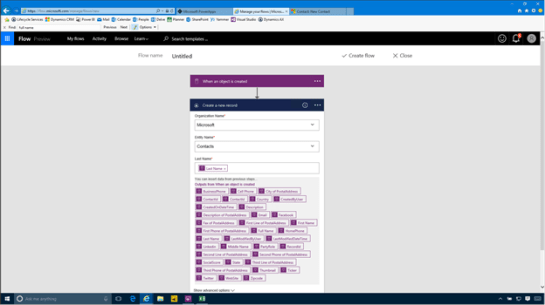
When we click on the Last Name field we will see all of the fields that are available for us to put in the field.


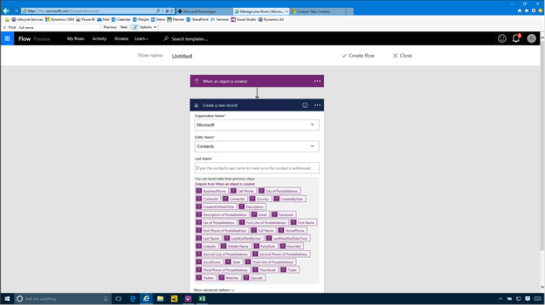
Just click on the Last Name field from the Common Data Model entity and it will be added to the field.


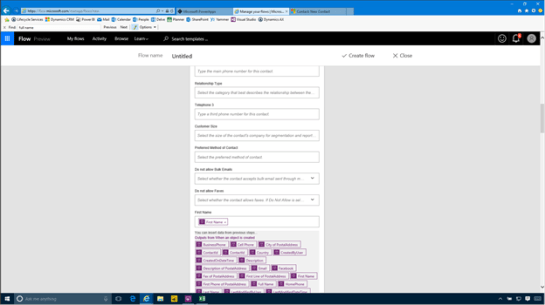
If we click on the Show Advanced Options button we will see that there are more fields that we can update.


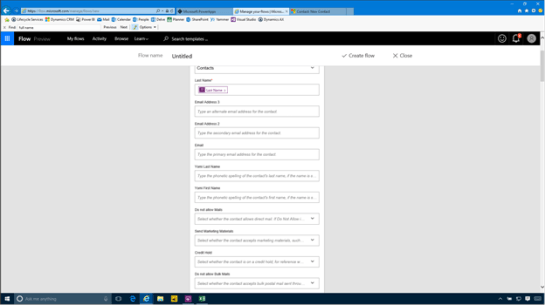
Here we updated the First Name as well.


Adding an Action to create a Lead in Dynamics

Additionally we added another step that we want to perform when the contact is created, and that is to create a Lead. We went through the same process as we did with the Contact, except we just select the Lead entity type from CRM.


Publishing the Flow

After we have done that we can publish the Flow and start it running in the background. To do this we start off by giving our Flow a Flow Name and then click on the Create Flow button.


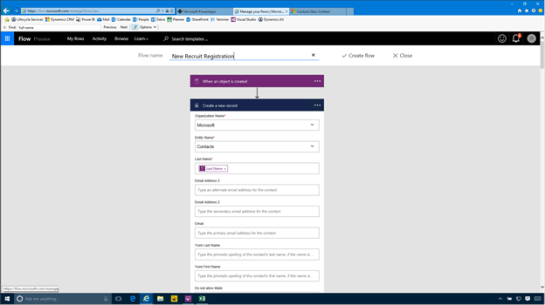
That will save the Flow away for us and then we can close out of the page.


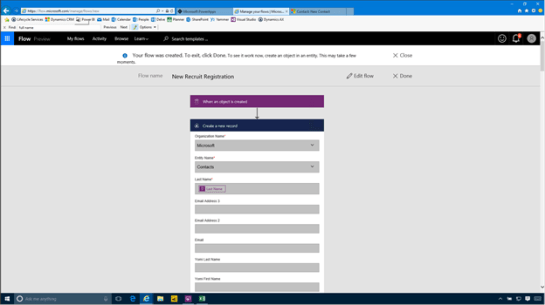
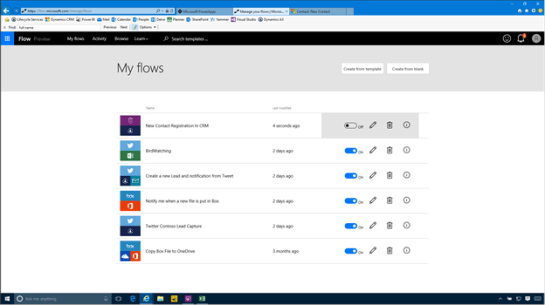
When we return back to our list of Flows we will see that we have a new flow process registered.


Testing out the Flow automation

Now that we have created our flow we can test it out. To do this we will just return back to our PowerApp and register a new contact.


Then return to Flow and click on the i icon to the right of our new Flow to see the flow details.


This will show us all of the events that have been triggered and after a bit we should see that the flow has been successfully processed.


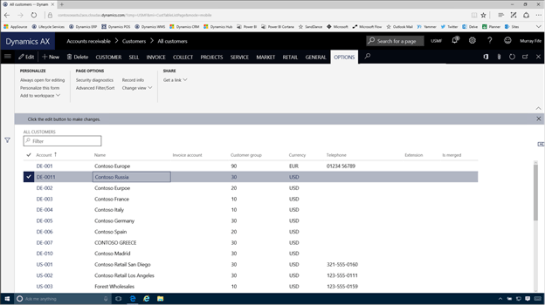
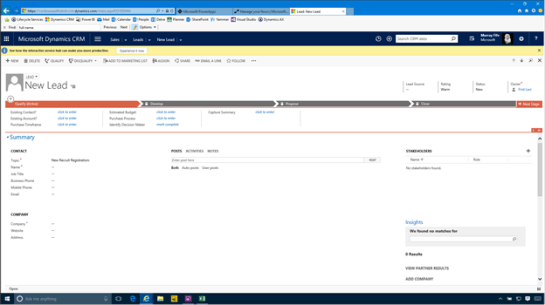
When we open up Dynamics we will see that the contact has been created for us.


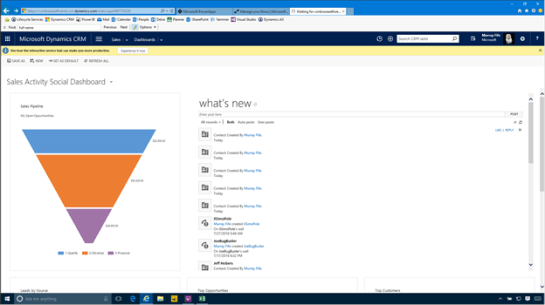
And also a new lead has been created for us as well.


Review

With just a little bit of work we have been able to create a new mobile application that captures contact information within the Common Data Model and then created new records within Dynamics without writing a single line of code (functions don’t count).

How cool is that.

About the Author

Murray Fife is an Author of over 25 books on Microsoft Dynamics AX including the Bare Bones Configuration Guide series of over 15 books which step the user through the setup of initial Dynamics AX instance, then through the Financial modules and then through the configuration of the more specialized modules like production, service management, and project accounting. You can find all of his books on Amazon at http://www.amazon.com/author/murrayfife.

Murray is also the curator of the Dynamics AX Companions (www.dynamicsaxcompanions.com) site which he built from the ground up as a resource for all of the Dynamics AX community where you can find walkthroughs and blueprints that he created since first being introduced to the Dynamics AX product.

Throughout his 25+ years of experience in the software industry he has worked in many different roles during his career, including as a developer, an implementation consultant, a trainer and a demo guy within the partner channel which gives him a great understanding of the requirements for both customers and partner’s perspective.

For more information on Murray, here is his contact information:

Email:
mcf@dynamicsaxcompanions.com
Twitter: @murrayfife

Facebook: facebook.com/murraycfife
Google: google.com/+murrayfife
LinkedIn: linkedin.com/in/murrayfife

Blog: atinkerersnotebook.com

Docs: docs.com/mufife
Amazon: amazon.com/author/murrayfife

Collaboration workspaces for Projects are a great way to provide a central repository for all of your project documents that everyone (or at least everyone that you want to) can have access. This takes advantage of the SharePoint Sites that Dynamics is able to automatically create if you like.

But with Office 365, a new option is available to us, and that is the Office 365 Groups. Groups provide a couple of additional features that make it a better alternative to the SharePoint sites because it allows you to create your own personal group, with its own OneDrive for Business repository, Project OneNote Notebook, Project Calendar, Project Conversation board and much more.

Although Dynamics does not automatically create the group for us, that doesn’t mean that we can’t use this for our workspace though, all we need to do is link the group to our Project. This is a small tradeoff for what this give us in return.

How to do it…

To do this, all we need to do to start off with is to open up Office 365 and go into Outlook. We will see that all of our Groups are shown on the left hand side of the view.


Just click on the + button to create a new group.


Then give your new group a Name that has not been taken. A quick tip here is to prefix all of the project groups with Project to help make them unique.

After we have done that we can just click on the Create button.


After the group is created, we will also be asked to invite any project members that we may want to have access to the project right away. We can search through our company directory and find the common project members.


After we have selected all of our project members then we just click on the Add button to add them to the Group.


After doing that we will have a new Office Group that we can start using to track all of our documents.


After embellishing it a little bit we are ready to start taking advantage of the group for our project collaboration.

To do this we want to click on the View Group Files and Activity link.


This will open up the document repository that is connected to the Group.


All we need to do is copy the base URL – everything up to the Shared Documents part of the URL.


Now we will want to connect the Document workspace to the project. In order to do this we will want to open up the project and then click on the Collaboration Workspace link within the Project ribbon bar and then click on the Link collaboration workspace option.


This will open up a dialog panel for us where we can specify the Internal and External URL for the collaboration site. All we need to do here is paste in the URL’s and then click on the OK button.


When we return back to the project we will see that the URL’s now show up in the Collaboration Workspace fast tab.


If we click on the link then we will be able to access all of the documents that have been filed away against the Office 365 Group.


As a bonus we have a OneNote Online notebook just for the Office Group.


And as a bonus bonus, we can create our own Planner task boards that are associated just with the Office 365 Group.


Review

How cool is that?

PS. This is a rhetorical question – Office Groups and Collaboration workspaces go together like Peanut Butter and Jelly.

About the Author

Murray Fife is an Author of over 25 books on Microsoft Dynamics AX including the Bare Bones Configuration Guide series of over 15 books which step the user through the setup of initial Dynamics AX instance, then through the Financial modules and then through the configuration of the more specialized modules like production, service management, and project accounting. You can find all of his books on Amazon at http://www.amazon.com/author/murrayfife.

Murray is also the curator of the Dynamics AX Companions (www.dynamicsaxcompanions.com) site which he built from the ground up as a resource for all of the Dynamics AX community where you can find walkthroughs and blueprints that he created since first being introduced to the Dynamics AX product.

Throughout his 25+ years of experience in the software industry he has worked in many different roles during his career, including as a developer, an implementation consultant, a trainer and a demo guy within the partner channel which gives him a great understanding of the requirements for both customers and partner’s perspective.

For more information on Murray, here is his contact information:

Email: mcf@dynamicsaxcompanions.com
Twitter: @murrayfife

Facebook: facebook.com/murraycfife
Google: google.com/+murrayfife
LinkedIn: linkedin.com/in/murrayfife

Blog: atinkerersnotebook.com

Docs: docs.com/mufife
Amazon: amazon.com/author/murrayfife


Dynamics ERP is great by itself as a transactional system, but when you incorporate all of the other services that are available through Office 365, it becomes even more powerful.

In this worked example we will show a quick scenario to illustrate this where the users can collaborate using these tools, and show how a Project Administrator is able to quickly find out information about a questionable project that just landed within their workspace.

How it works…

The project administrator logs into their Project Management workspace to review all of the active projects and notices a new project that has been added that piques their interest.


They open up the project details to find out a little more information on the project.


Drilling into the Project Work Breakdown Structure, they have a couple of concerns regarding the project plan.


They return back to the project and see that a Project Manager has been assigned, and they open up the contact card and see that the Project Manager is online via Skype through the Presence indicator.


The project administrator starts a Skype conversation with the Project Manager.


The Project Manager is currently online within Office 365 and gets a notification that the Project Administrator is wanting to talk to them, and accepts the conversation.


Through Office 365 they are able to use Skype online without having to open up a Skype client.


The Project Manager drops the Project Administrator a quick note describing the project objectives and the status of the project.


The Project Administrator confirms that the project is a go through Skype.


The Project Manager adds a quick note to tell the Project Administrator that there are also more details on the project within the SharePoint Collaboration Workspace where they are storing more information about the project.


The Project Administrator clicks on the Collaboration Workspace link within the Project details.


They open up the Project Collaboration workspace and see that there are some additional documents that have been saved away within SharePoint.


This allows them to see more information about the project.

Everything looks pretty well planned out.


Review

How cool is that.

More Information

If you want to see the scenario, I posted it here on docs: https://doc.co/tvw8jv

About the Author

Murray Fife is an Author of over 25 books on Microsoft Dynamics AX including the Bare Bones Configuration Guide series of over 15 books which step the user through the setup of initial Dynamics AX instance, then through the Financial modules and then through the configuration of the more specialized modules like production, service management, and project accounting. You can find all of his books on Amazon at http://www.amazon.com/author/murrayfife.

Murray is also the curator of the Dynamics AX Companions (www.dynamicsaxcompanions.com) site which he built from the ground up as a resource for all of the Dynamics AX community where you can find walkthroughs and blueprints that he created since first being introduced to the Dynamics AX product.

Throughout his 25+ years of experience in the software industry he has worked in many different roles during his career, including as a developer, an implementation consultant, a trainer and a demo guy within the partner channel which gives him a great understanding of the requirements for both customers and partner’s perspective.

For more information on Murray, here is his contact information:

Email: mcf@dynamicsaxcompanions.com
Twitter: @murrayfife

Facebook: facebook.com/murraycfife
Google: google.com/+murrayfife
LinkedIn: linkedin.com/in/murrayfife

Blog: http://www.atinkerersnotebook.com

Docs: docs.com/mufife
Amazon: amazon.com/author/murrayfife

Managing security within Microsoft Dynamics has just got a little easier because there is a feature called Security Diagnostics that is built into all of the forms that allows us (if we have rights that is) to see all of the Roles, Duties, and Privileges that have access to a form, while we are on the form itself.

Also this feature allows us to even update the user security access while we are browsing this information as well, so if we want to give someone access, we don’t have to guess which security objects have access and then update the security. We just find the form and then give them access.

How it works…

To see the security information for any form, just click on the Options tab on any of the forms, and then click on the Security Diagnostics link within the Page Options group.


This will open up the Security Diagnostics panel and we will be able to see all of the Roles that have access to this form.


Also, if we scroll down a little then we will also see all of the Duties and Privileges that are associated with this form as well.

If we want to modify the security on the fly and assign the security objects to a user, then all we need to so is select the security object and then click on the Add roles to user link.


This will open up the security maintenance form and we can update the user security on the fly.


Review

This is a very useful feature to keep in our back pocket. Although it doesn’t make security management a super simple function, it does make it a little simpler.