Dynamics AX For The Musophobic
One of the most debilitating afflictions within the Microsoft Dynamics AX community is Musophobia which is the abnormal fear of the mouse. It is commonly accompanied by a severe case of Clickarexia which is the unnatural avoidance of mouse button clicks, and the goal to achieve the golden number of 0 clicks each day.
Don’t worry though, there is hope for you all because you can do almost everything that you need to do within Dynamics AX without having to take your fingers off the keyboard. In the following overview we will show you all of the keyboard shortcuts and tricks for navigating through the Dynamics AX client.
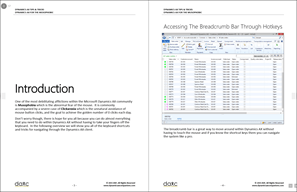
Accessing the Breadcrumb Bar through Hotkeys
The breadcrumb bar is a great way to move around within Dynamics AX without having to touch the mouse and if you know the shortcut keys them you can navigate the system like a pro.
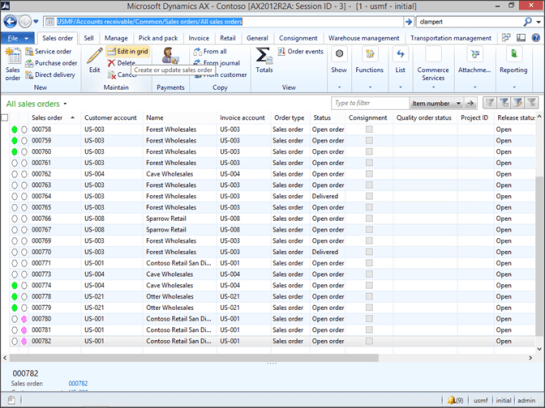
The first trick that you will want to know is how to access the Breadcrumb Bar without using the mouse. This is a synch – all you need to do is press F11 and it you will be taken straight up there.
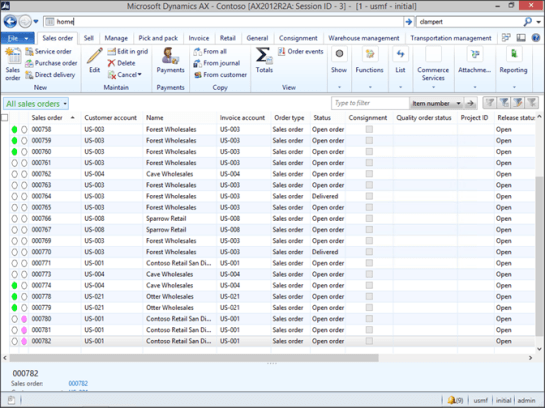
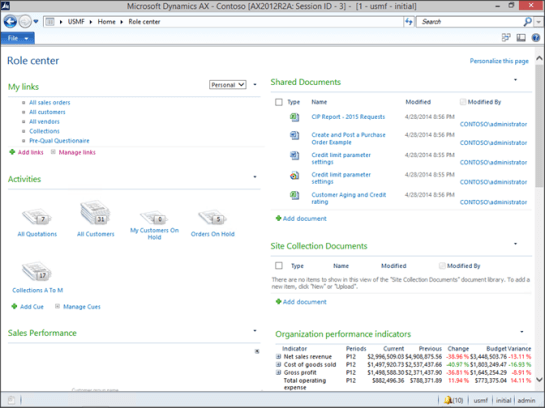
Using the Breadcrumb Bar to Navigate Home
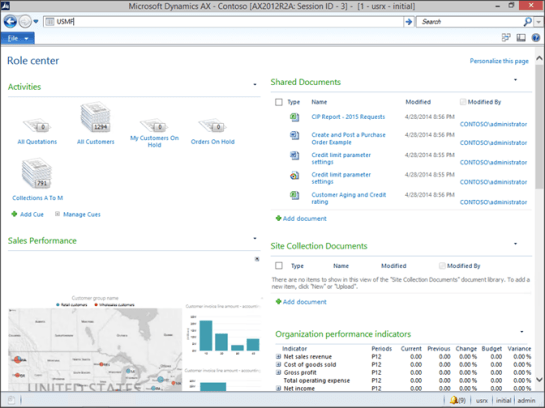
The role center is a great reset point for you to navigate back to, and you can use the breadcrumb bar to take you there. All you need to do is type in home and press enter. You will then be taken to your Role Center.
Changing Companies through the Breadcrumb Bar
Another shortcut that you may want to take advantage of through the breadcrumb bar is changing companies. To do this, start off by pressing F11 to access the breadcrumb bar.
Then just type in the company that you want to switch to and then press ENTER. Immediately you will be swapped to the new company. That saves a whole lot of mouse clicks for sure.
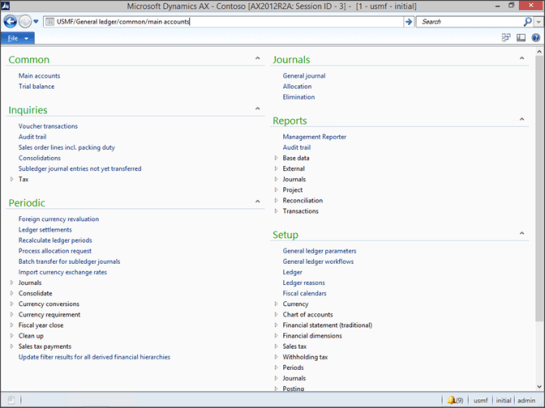
Accessing Area Pages through the Breadcrumb Bar
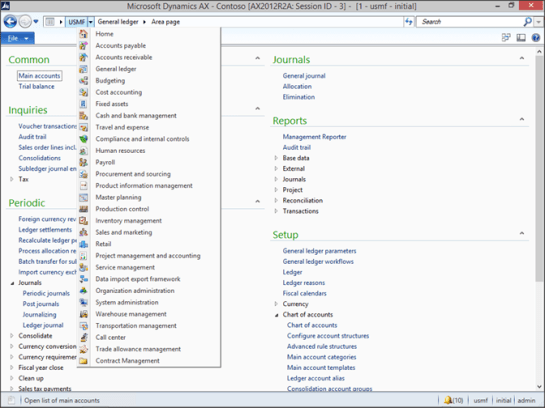
Something else that you may want to do is move to a particular area page within the menus quickly, and you can do this easily through the breadcrumb bar without touching the mouse. To do this, start off by pressing F11 to access the breadcrumb bar.
Then type in the area page that you want to go to. Immediately you will be taken straight to the area page that you asked for.

Opening Up Forms through the Breadcrumb Bar
If you really don’t like the mouse then you can take the navigation through the breadcrumb bar even further by specifying the form that you want to open. To do this, just press F11 to access the Breadcrumb Bar.
Then replace the Area Page with the tree path to the form that you want to open. That will open the form for you without having to touch the mouse.
Navigating Within Area Pages
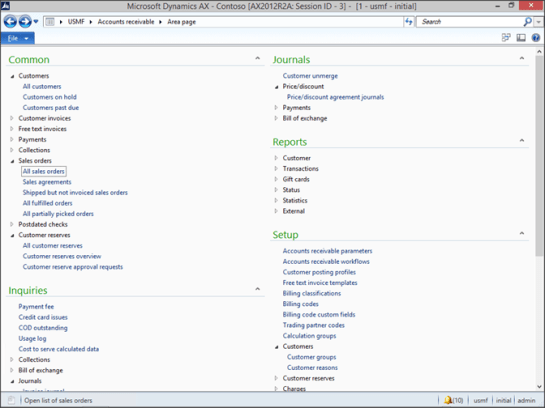
You can navigate to forms another way as well that doesn’t require you memorizing all of the form names. And that is through the Area Pages themselves. To do this we will just switch over to an area page.
When we are taken to the Area Page the focus will change from the Breadcrumb Bar over to the main page itself, and the first menu item on the page will be selected. If you press the TAB key then you will be able to move to the next item within the menu page. To open the form, all you need to do is press the ENTER key. That will open up the form that you selected.
Navigating Within Page History
Dynamics AX also tracks the history of where you have been within the system, and this feature allows you to return to any form that you may have been on during your session. You can see the history just by clicking on the history dropdown arrow beside the back and forth buttons.
Although we don’t have to use the mouse to navigate back and forth within the history. All you need to do is press ALT+LEFT ARROW and ALT+RIGHT ARROW to move back and forth within the history. That will return you back to the previous form that you were on.

Cycling Through Area Pages
One last trick that you can use to help you navigate through the application with the keys is to use the CTRL+TAB to move consecutively through area pages.
To move to the next area page just press CTRL+TAB. That will take you to the next Area Page is the list.
To return back to the previous menu item within the list just press CTRL+SHIFT+TAB.
Using Shortcut Keys within Forms
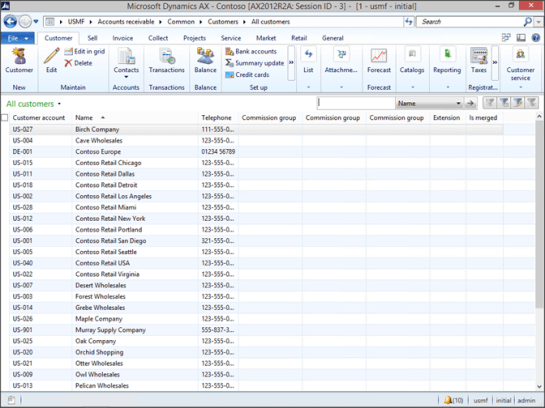
The shortcut keys are not just used to navigate within the menus, you can also cut your ties to the mouse within all of the transactions as well. As an example let’s type in a sales order. First we will select the All Sales Orders form. And then press Enter.
Navigating the Ribbon Bar and Forms through Shortcut Keys
That will take us to the list of all the sales orders. In order create a new sales order though we need to access the Ribbon bar. In order to do this, all you need to do is press the ALT key.
You will notice that a number of different keys will show up in the ribbon bar that tell you what to press to select the ribbon bars, and also the individual groups within the currently selected ribbon bar. We want to create a new Sales Order, and that is in the New group, so we just need to press N.
That will take us into the New ribbon bar group, and since there are a few options that are available there as well we need to select again. The Sales Order option is highlighted with an S so that’s what we should press. Since there are two options available to us that start with S then we will see both menu items, although only one will be highlighted. If we wanted to choose the next option then we could press S again, but in this case it’s the right selection so all we have to do is press ENTER to select the button.
That will open up the Create Sales Order dialog box, and we can use the tab key to move between forma and also the ALT and arrow keys to access dropdown lists. You can then select the records within the dropdown lists with the arrow keys. Once you are on the record that you want just press ENTER. From here you can go directly into the order detail form by pressing ALT+O to select the OK button.
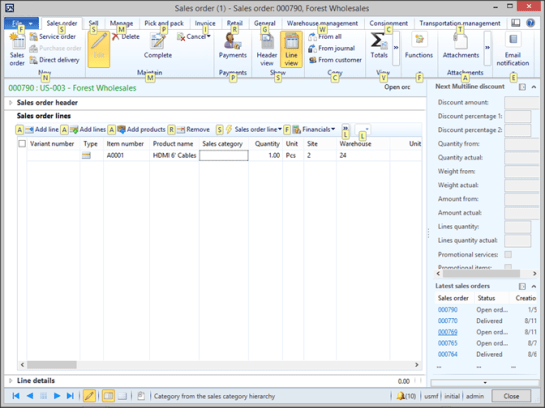
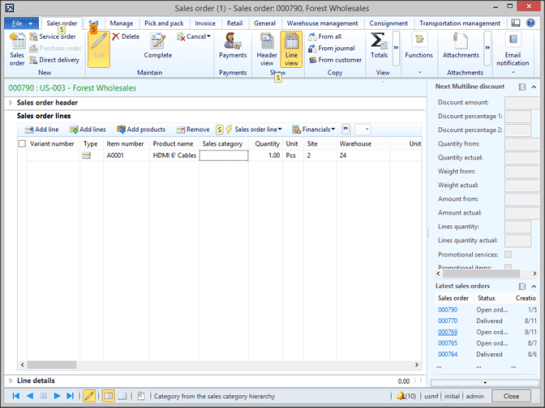
Now you will be in the order detail form, and you will be within the lines ready to enter in a part code. If you know the part code that you want to add to the order then you can just type it in, or you can search by using the dropdown list.
Accessing Different Ribbon Bars
Now that you have a line on your order you can start processing it through the ribbon bar. The problem is that the Confirm function is within the Sell ribbon bar which is not visible so we will need to use the shortcut keys to change the ribbon bar. To start doing this just press the ALT key.
The Sell ribbon bar has the S shortcut key so that is what we should select. You will notice that there are a few shortcuts that use the S key so we need to cycle through them by pressing the S key again.
Still not quite there, so we will need to press S again. Once the Sell ribbon bar is selected then we can press ENTER to change to that ribbon bar.
Now that we can see the Order Confirmation buttons we can use the shortcut keys to kick off the Sales Order Confirmation.
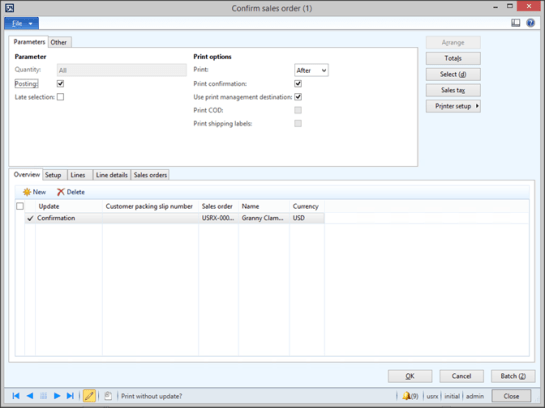
Confirming Dialog Boxes
When the Confirm Sales Order dialog box is displayed, all we need to do is use the shortcut keys to select the OK button. And that will print (or send) our order confirmation out for us. When we are finished looking at the order confirmation, just press ALT+F4 to close the form and we can move onto the next transaction.
Closing Windows with Shortcut Keys
To exit out of the order that you just entered just press ALT+F4 again.

Returning Home
That will return you to your All Sales Orders list page. If you are done entering in orders then you can use the breadcrumb bar to return to your role center home page. Now you’re back where you started from.
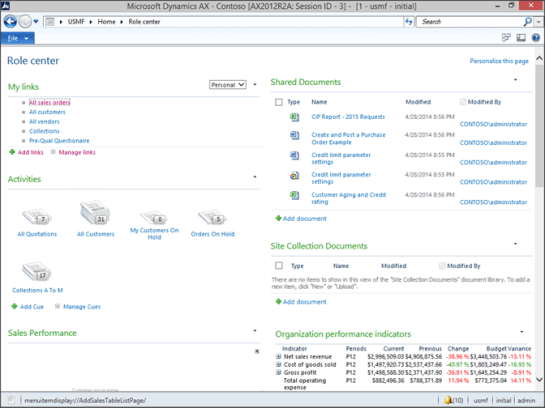
Using My Links to Navigate To Forms
One other way that you can open up forms is directly from the Role Center itself. If you have added menu items to your My Links web part then you can use the TAB key to move too them. You will notice that your My Links links are now highlighted. To open up the form just press ENTER. Now you are back in the Orders list page.
You can navigate back to the home page by pressing the ALT-LEFT ARROW KEY or by typing in home within the breadcrumb bar.
Conclusion
Hopefully this walkthrough has shown you that Dynamics AX is easily navigated through the keyboard shortcuts. There may have been a couple of tricks that may make those of you that are not Musophobic reach for the mouse just a little less.
Additional Resources:
If you are looking for a more detailed walkthrough of all the features and functions then you can check out the Dynamics AX Companions site. Just click on the images below to find it.

About The Author:
Murray Fife is a Microsoft Dynamics AX MVP, Author of over 20 books on Microsoft Dynamics AX, and Solution Architect at I.B.I.S. Inc. with over 20 years of experience in the software industry. Like most people in his industry he has worked in many different roles during his career, including as a developer, an implementation consultant, and a trainer which gives him a great understanding of the requirements for both customers and partners. He is a regular contributor to the Dynamics AX community and in addition to hosting presentations for I.B.I.S. presents regularly for the AXUG and MS Dynamics World, has spoken at Microsoft Convergence and AXUG Summit conferences. If that was not enough, he works closely with Microsoft evaluating with their beta products and also is a Council Member on the Microsoft Dynamics Academic Alliance trying to help educate the new generation of consultants on Dynamics AX.

Reblogged this on Dynamics AX Companions.