Merging pictures and tips within walkthrough guides using Author Tools
If you are creating walkthroughs that include screen shots, then it is sometimes useful to include elements that highlight what is being done. This could include mouse clicks that are being performed, text that is being entered, or simply areas that you want to highlight or emphasize in the document.
It is a big hassle to go and edit the pictures each time in order to include the added information, and also you corrupt the original image when you do this. A better way to include tips is just to add them as shapes on the draft.
By default, though the Author Tools copy the main picture to the documents, but there is an option that will allow you to merge both the Picture and the extra graphics together when the document is being generated to create a merged illustration.
Here is how you can do that.
How to do it…
Start off with your PowerPoint step that you want to add a tip to.
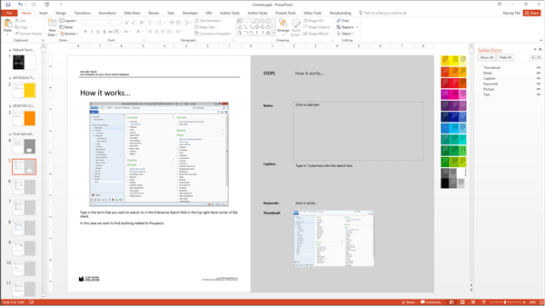
Then add the tip shapes on top of the picture.

Make sure that the shape is either called Tip or if you have multiple shapes that make up the tip graphic that the parent shape is called Tip. This will be how the tools are able to find the tip and merge it.

Then switch to the Author Tools ribbon bar.

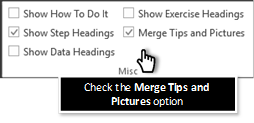
Make sure that the Merge Tips and Pictures check box is checked. If you have this unchecked, then the document that you create will just have the Picture element and not the tip – which is useful if you are wanting to create clean documents and have the tips as captions.
How it works…
To see the finished walkthrough, just click on the Create Walkthrough button within the Author Tools ribbon bar.

When the walkthrough is created the image that is pasted into the document will include both the Picture and also the Tip element

Review
This is a great tool that allows you to add annotations to your walkthroughs and screen shots without adding a lot of editing administration to the draft content. Additionally, the way that the tips appear in the draft is how they will appear within the document so you don’t have the situation where the illustrations don’t match because of resizing of the image components.
How easy is that!
About the Author
 Murray Fife is an Author of over 25 books on Microsoft Dynamics AX including the Bare Bones Configuration Guide series of over 15 books which step the user through the setup of initial Dynamics AX instance, then through the Financial modules and then through the configuration of the more specialized modules like production, service management, and project accounting. You can find all of his books on Amazon (www.amazon.com/author/murrayfife) and also even more on the BSP (www.blindsquirrelpublishing.com) site.
Murray is also the curator of the Dynamics AX Companions (www.dynamicsaxcompanions.com) site which he built from the ground up as a resource for all of the Dynamics AX community where you can find walkthroughs and blueprints that he created since first being introduced to the Dynamics AX product.
Throughout his 25+ years of experience in the software industry he has worked in many different roles during his career, including as a developer, an implementation consultant, a trainer and a demo guy within the partner channel which gives him a great understanding of the requirements for both customers and partner’s perspective.
For more information on Murray, here is his contact information:
Email: mcf@blindsquirrelpublishing.com
Twitter: @murrayfife
Facebook: facebook.com/murraycfife
Google: google.com/+murrayfife
LinkedIn: linkedin.com/in/murrayfife
Blog: atinkerersnotebook.com
Docs: docs.com/mufife
Amazon: amazon.com/author/murrayfife
