Archive

Author Archives: B-List Microsoft Celebrity, Available for Weddings and Bar Mitzvahs

Flow is great, and just being able to point and click to build integrations is the thing that makes it so usable. But sometimes you want to be a little bit cleverer with your data and even use functions that remodel the data.

For example, when creating a new Customer within Dynamics 365 for Operations through Flow when a new Account is created in the Common Data Service, if you are like me, then maybe you will want to have a consistent naming convention, and you don’t want to use the standard Account ID that is created in the entity.

My customer naming convention is the first two letters of the Organization Name and then 4 digits, but I cannot change the default numbering format for the Account Id in the Accounts entity.

If I were doing this through Excel, then I would use this formula: 

Upper(Left(OrganizationName)) & Right(AccountId,4)

But how do you do this in Flow?

The good news is that there is a special Data Operations service within Flow that allows you to create a function using data from the previous steps in the flow, and then you can use the output in subsequent steps.

Here is how you do it.

How to do it…

To start off open Flow and then create a new Flow by clicking on the + Create from blank link.

When the trigger event is displayed, search for the Common Data Service actions and select the When a record is created trigger event.

This will then create a trigger for you that needs to be configured.

Click on the The database dropdown list and select the default database.

Then click on the The entity dropdown list and select the Account entity from the list.

Now that we have the trigger which will fire when a new Account is created within the Common Data Service we want to add a step that will create our new account name from the data. To do this, click on the + New Step button and then select the Add an action button.

When the action browser is opened, search for the Data Operations service and then select the Compose action.

This will open a simple action that just has an Input field. This is where we need to create our function that will create our new Customer Number.

The function will be written in the Azure Workflow Definition Language and if you want to find all the documentation on it then here is the link:

https://docs.microsoft.com/en-us/azure/logic-apps/logic-apps-workflow-definition-language

To create the new customer number that is the first two letters of the Organization Name and the last 4 digits of the Account Id (since this is a sequential number) then just paste in this function:

“@concat(toUpper(substring(triggerBody()[‘OrganizationName’],1,2)),substring(triggerBody()[‘AccountId’], sub(length(triggerBody()[‘AccountId’]),4), 4))”

After you have done that just give the Flow a Flow name and then click on the Create flow button.

After the record has been published then you will see that the Account ID is created for the Account.

When you return to you Flow you will see that is has been triggered and if you expand out the Compose action then the Output is now set to the format that we want for our Customer Numbers.

Summary

Now that we have composed our new field we can now use it in future steps within the Flow. For example if you continue on and add another action that created the Customer within Dynamics 365 for Operations, but when populating the Customer Number field, we can now use the output of the Compose action.

How cool is that? (Rhetorical question)

Power BI is a great tool for visualizing your data from Dynamics 365, but wouldn’t it be great if all of your reports and dashboards that you create were embedded directly into your dashboards. Don’t fret, you can do this without writing a single line of code.

Let’s see how to do this and how it works.

Topics Covered

  • Enabling Power BI
  • Adding Power BI Dashboards as Sales Dashboards
  • Drilling through the Data within Power BI

Enabling Power BI

Before we start adding Power BI to our dashboards within Dynamics 365 for Sales we need to first make sure that it is enabled.

How to do it…

To do this, start off by opening the Dynamics 365 for Sales app.

Then click on the Sales tile in the header and click on the Settings tile. Then click on the Administration menu item within the System menu group.

When the Administration page is shown, click on the System Settings menu link.

This will open the System Settings options panel. Click on the Reporting tab within the options and you will be able to see an option called Allow Power BI visualization embedding.

All you need to do here is make sure that this is set to Yes.

After you have turned on Power BI then you can exit out of the options.

Adding Power BI Dashboards as Sales Dashboards

Now that Power BI is enabled, you can start adding Power BI visualizations directly within Dynamics 365 for Sales as their own embedded dashboards.

How to do it…

To do this, all you need to do is open the main Sales Dashboards by clicking on the Sales button in the menu bar and then click on the Dashboards menu item within the My Work menu group.

To add a Power BI Dashboard, just click on the New menu item and then select the Power BI Dashboard menu item.

This will open the Add Power BI Dashboard dialog box and if you click on the Dashboard dropdown list then you will see that all of the dashboards that you have access to within Power BI will show in the list.

All you need to do here is select the dashboard that you want to use as a dashboard and then click on the Save button.

After you have done that you will see the dashboard is now embedded within Dynamics 365 for Sales as one of your personal Dashboards.

Drilling through the Data within Power BI

Now that that you have Power BI dashboards embedded directly within the dashboards, let’s see what you can do with the data that is there.

This will take you over to Power BI Online.

But there’s more. If you click on the in the top right of the Power BI Workspace, then you will see an option that allows you to Analyze in Excel.

If you click on this, you will be taken over to Excel and all the data that you had within the Power BI workspace will be available as a Pivot Table.

If you want to be a little retro, then you can then create your very own analysis through Excel using the same data that you have within Power BI.

Summary

Power BI is a great reporting tool to take advantage, and as you can see it’s super easy to get the dashboards embedded directly within Dynamics 365 for Sales and then act upon it right from there.

All you need to do now is create the dashboards that you want to include and then start embedding them.

In May I will be helping out with the Microsoft Dynamics 365 Operations (Dynamics AX) boot camp in West Palm Beach at Palm Beach Atlantic University to train new graduates.  So I thought that I would forward on the information about that and also the other boot camps that are being held this year in conjunction with the Microsoft Academic Alliance.

All classes/courses/boot camps to be held in West Palm Beach at Palm Beach Atlantic University and the classes for 2017 are:

May 22-26th – Microsoft Dynamics 365 Operations (AX-Axapta) Bootcamp
May 22-25th – Microsoft Dynamics 365 CRM Bootcamp
July 2017 – Microsoft Dynamics 365 Financials Faculty/Professional Bootcamp

May Microsoft Dynamics 365 Operations or CRM Bootcamp

    • Bootcamp $495
    • Dorm Lodging $150 (for the week) Luxury dorms, many overlooking the Ocean
    • Conference hotel rates also available
    • Some scholarships available

July Microsoft Dynamics 365 Financials Bootcamp

    • Bootcamp $595
    • Low cost conference hotel rates available
    • Family outings for participants interested in bringing their family
    • Faculty receive coursework and outlines to jump start classroom learning

They are also looking for partners to participate, and is also a great place to find new talent.

If you are interested in helping here are the boot camps offered this Spring/Summer for

  • Microsoft Dynamics 365 Operations (Dynamics AX)
  • Microsoft Dynamics 365 Financials (Dynamics NAV)
  • Microsoft Dynamics 365 CRM (Sales and Service)

There is more information at www.aadynamicstraining.com

If you also want to complete the following 2 question survey then they will keep you updated on opportunities and details.

http://survey.constantcontact.com/survey/a07edrotzxriykvxzmv/start

You can pass this link onto others that may be interested as well.

Maybe I will see some of you all there 😊


Introduction

Dynamics 365 for Operations allows you to configure your own Vendor Evaluation Criteria and then track the vendor performance against any or all the criteria that you have defined.

In this worked example we will show how to configure the Vendor Evaluations groups and criteria and how you can record evaluation results against vendors.

Creating Vendor Evaluation Criteria Groups

The first step in configuring the Vendor Ratings within Dynamics 365 for Operations is to create some Vendor Evaluation Criteria Groups. These will be used to group common sets of evaluation criteria together and allow you to get summary results on the evaluations at the criteria group level.

In this worked example we will show how to set up a set of new Vendor Evaluation Criteria Groups.

How to do it…

To do this, open the navigation panel, expand out the Modules group, and click on the Procurement and Sourcing module to see all the menu items that are available. Then click on the Vendor evaluation criteria group menu item within the Vendor folder within the Setup menu group.


Alternatively, you can search for the Vendor evaluation criteria group form by clicking on the search icon in the header of the form (or press ALT+G) and then type in vendor eval into the search box. Then you will be able to select the Vendor evaluation criteria group maintenance form from the dropdown list.


This will open the Vendor evaluation criteria groups maintenance form, and we will see that we don’t have any records yet.


To add your first Vendor evaluation criteria group record, just click on the New button on the menu bar.


Now enter your Criteria Group code in the Name field.

For example, here we set the Name to QUALITY.


Next, give your Criteria Group a more detailed Description.

For example, here we set the Description to Quality Ratings.


Now we can continue and add a few more Vendor Evaluation Criteria Groups.

When we are done, we can just exit from the form.


Sample Data

Name Description
OVERALL Overall Evaluation Criteria
SERVICE Service Evaluation
PRICING Pricing Criteria
DELIVERY Delivery Performance
QUALITY Quality Ratings

Creating Vendor Evaluation Criteria

Once you have set up your Vendor Evaluation Criteria Groups, you will need to set up some Vendor Evaluation Criteria codes that you will use to rate your vendors.

In this example, we will show how to set up some Vendor Evaluation Criteria.

How to do it…

To do this, open the navigation panel, expand out the Modules group, and click on the Procurement and Sourcing module to see all of the menu items that are available. Then click on the Vendor evaluation criteria menu item within the Vendor folder within the Setup menu group.


Alternatively, you can search for the Vendor evaluation criteria form by clicking on the search icon in the header of the form (or press ALT+G) and then type in vendor eval into the search box. Then you will be able to select the Vendor evaluation criteria maintenance form from the dropdown list.


This will open the Vendor evaluation criteria maintenance form, and we will see that we don’t have any records yet.


To add your first Vendor evaluation criteria record, just click on the New button on the menu bar.


Now enter your Criteria code in the Name field.

For example, here we set the Name to Competitive pricing.


Next, give your Criteria a more detailed Description.

For example, here we set the Description to “The prices paid should be comparable to those of vendors“.


Finally, we will want to assign the Criteria to a Vendor evaluation criteria group.

For example, here we set the Vendor evaluation criteria group to “PRICING“.


Now we can continue and add a few more Vendor Evaluation Criteria records.

When we are done, we can just exit from the form.


Sample Data

Name Description Vendor evaluation criterion group
Sensitive to costs The vendor should demonstrate respect for the customer firm PRICING
Consistency Supplier’s ability to exhibit quality and reliability OVERALL
Cost Total acquisition cost, not just price OVERALL
Cash resources Financial resources and stability of the supplier. Profit OVERALL
Control Effective management control and information systems OVERALL
Commitment Supplier’s willingness to commit physical, intellectual OVERALL
Capacity Supplier’s ability to meet physical, intellectual OVERALL
Competency Managerial, technical, administrative, and professional OVERALL
Problem resolution The vendor should respond in a timely manner to resolve SERVICE
Emergency support Does the vendor provide emergency support for repair SERVICE
Good vendor representatives have sincere desire to serve Vendor reps display courteous and professional approach, and SERVICE
Emergency delivery Does the vendor demonstrate extra effort to meet requirement DELIVERY
Documentation Does the vendor furnish proper documents DELIVERY
Packaging Packaging should be sturdy, suitable, properly marked DELIVERY
Lead time Is the average time for delivery comparable to that of other DELIVERY
Quantity Does the vendor deliver the correct items or services DELIVERY
Technical support Does the vendor provide technical support for maintenance SERVICE
Inside sales Inside sales should display knowledge of buying firms needs SERVICE
Time Does the vendor deliver products and services on time DELIVERY
State-of-the-art product/service Does the vendor offer products and services that are consist QUALITY
Warranty The length and provisions of warranty protection offered QUALITY
Support Is quality support available from the vendor? QUALITY
Durability Is the time until replacement is necessary reasonable? QUALITY
Reliability of repairs Is all repair and rework acceptable? QUALITY
Reliability Is the rate of product failure within reasonable limits? QUALITY
Conformity to specifications The product or service must conform to the specifications id QUALITY
Compliance with purchase order The vendor should comply with terms and conditions as stated QUALITY
Billing Are vendor invoices are accurate? PRICING
Advance notice of price changes The vendor should provide adequate advance notice of price PRICING
Price accuracy There should be a low number of variances from PO’s PRICING
Price stability Prices should be reasonably stable over time PRICING
Competitive pricing The prices paid should be comparable to those of vendors. PRICING

Configuring Vendors for Evaluation

The final step in the setup process is to link the Evaluation Criteria with the Vendors within Dynamics 365 for Operations. This is done through the Procurement Categories.

In this example, we will show how to setup the Evaluation Criteria within the Procurement Categories and how to select the Vendors that you want to evaluate.

How to do it…

To do this, open the navigation panel, expand out the Modules group, and click on the Procurement and Sourcing module to see all the menu items that are available. Then click on the Procurement categories menu item within the Vendors menu group.


Alternatively, you can search for the Procurement categories form by clicking on the search icon in the header of the form (or press ALT+G) and then type in procurement cate into the search box. Then you will be able to select the Procurement categories maintenance form from the dropdown list.


This will open the Procurement categories maintenance form. Here we will see that we have several categories already configured.


Within the Procurement categories maintenance form select the top-level node of your Categories and then open up the Vendor evaluation criteria groups tab within the detail area. Here we will see that there are no evaluation criteria associated with this procurement node.

To associate your Vendor Evaluation criteria groups, click on the Add button in the tabs menu bar.


Select all the Evaluation Criteria Groups that you want the vendors to be measured on, and click on the -> button to add them to the selection box.


After we have done that we can just click on the OK button to return to the main form.


When we return to the Vendor Evaluation Criteria Groups we will be able to see the groups are associated with the procurement category.


Now we will want to associate the vendors that we want to evaluate at this procurement category.

To do this open the Vendors tab within the detail panel and click on the Add button within the tabs menu bar.


This will open an Add vendor dialog panel where we will be able to see all the vendors that we can add to this node.


All we need to do here is select all the vendors that you want to include in the evaluations, and click on the -> button.


This will add the vendors to the procurement category.

When you are finished, just click on the OK button to return to the main form.


You can continue this process for any of the leaf nodes in the Procurement Hierarchy.


Recording Vendor Evaluations

Once the evaluation criteria have been configured, you can start recording the vendor ratings.

In this example, we will show you how you can add Evaluation Ratings to your Vendors.

How to do it…

To do this, return to the Procurement Categories form, select the Procurement category that we have associated the vendors to.

Then select the vendor that you want to record the evaluations against and click on the Evaluations button within the tabs menu bar.


This will open the Vendor evaluation maintenance form with all the Evaluation Criteria Groups listed on the left, and all the Evaluation Criteria for that group on the right.


To update any of the vendor ratings, just select the rating for the criteria that you want to update and select the rating that you would like to apply.


Continue this process for all the evaluation criteria that you want to report on.


Repeat this for all the Criteria Evaluation Groups.

Notice that the Average Rating for the Evaluation Criteria Group will change as you enter in the results.

Once we have finished, we can just exit out of the form.


Conclusion

The Vendor Evaluation Criteria is a little hidden gem within Dynamics 365 for Operations. It allows you to start recording subjective ratings against the vendors and track the overall rating for the vendor based on performance.


There are times where you want to create alerts or notifications triggered off the data within Dynamics 365 for Operations. There are a number of different ways that you can do this, but one of the simplest ways to do this is through Flow which allows you to create simple integration points that trigger other events that you may want to chain off the data. All of this can be done without even having to resort to a single line of code, and also without touching the base Dynamics 365 for Operations functionality.

In this walkthrough we will show an example of how you can take advantage of Flow to create a simple email alert that is triggered off the creation of a new customer within the system.

Topics Covered

  • Create a new Entity within the Common Data Service
  • Creating a Flow to Add Operations Customers to the Customer Accounts Entity
  • Submitting the Flow to the Template Gallery
  • Viewing the Customer Accounts Entity Data
  • Creating an Email Notification Flow triggered on New Customers Being Added
  • Seeing it in Action

Read More

This week we have started working on our next project for the Bare Cones Configuration Guide series, which has been to start uplifting the Configuring the General Ledger guide from the Dynamics AX 2012 version to the Dynamics 365 for Operations release. Rather than wait to finish all of the 8 chapters before releasing out this content we have decided to release them out individually as we get them finished.

We are happy to say that the first module for the General Ledger is available and if you want to check it out here are all of the details.

BBCG03: Configuring the General Ledger within Dynamics 365 for Operations
MODULE 1: Configuring the General Ledger Controls

Before we can start posting to the General Ledger, there is a little bit of housekeeping that we need to do in order to set up all of the codes and controls. We need to configure our accounts that we will want to use within the ledger, set up our chart of accounts and also configure some of the defaults for posting to the ledger.

In this guide we will step you through the initial configuration of the General Ledger so that you can then start using it.

Topics Covered

  • Adding Currency Codes
  • Configuring the System Parameters
  • Adding additional Main Account Categories
  • Importing Main Account Categories through the Excel Add-In
  • Configuring a new Chart of Accounts
  • Adding a new Main Account to the Chart of Accounts
  • Creating a Main Account Import Template
  • Populating the Import Template
  • Configuring Account Structures
  • Creating a new Fiscal Calendar
  • Configuring a Company Ledger
  • Configuring the Accounts for Automatic Transactions

This module actually shrank a little from the AX 2012 version because of the improved way that we can import data from Excel and even create custom import templates using the Workbook Designer. That feature by itself is worth a peek at this guide.

If you are interesting in checking this guide out (or the earlier versions like the one for AX 2012) then here is a link to the all of the versions of this guide: http://bit.ly/2gHSjjv

If you are really up for a challenge then you may want to take on the Bare Bones Configuration Challenge. You can start with this guide and as we start releasing out the other 15 guides in the series then you can work through them as well. These guides will teach you how to configure a bare bones installation of Microsoft Dynamics 365 from scratch. If you complete all sixteen modules then you will become a Bare Bones Configuration Privateer and we will send you a badge to prove it.

Or if you want to go retro then you can do exactly the same thing with Dynamics AX 2012 – all of the guides are already available.

Also, if you want all of the content on the site and all of the new content that we are delivering then you may want to think about signing up for a Premium Membership. Once you have that you can plunder the entire site and download any of the books at any time. Here is the link: http://bit.ly/2fYMgTW

Watch out for use to release more modules as we get them finished over the next weeks.

In the past importing data into Microsoft Dynamics has been a little bit of work. The Data Management tools within Dynamics 365 for Operations makes it a little easier to package data up into data sets.

But if we want an easier way to import in data then there is a second option which is the Excel Workbook Designer which allows us to create Excel templates directly from the data entities and then use them to access and even import data within minutes.

In this walkthrough we will show how you can use this feature to do this by creating an import template that imports in Main Accounts in to the ledger.

Creating a Main Account Import Template

The first thing that we will want to do is create a new Excel Workbook that we will use to import in the data. Luckily this is a super simple task.

How to do it…

To do this, open up the navigation panel, expand out the Modules group, and click on the Organization administration module and click on the Excel workbook designer menu item within the Office integration subgroup of the Setup menu group.


Alternatively you can search for the Excel workbook designer form by clicking on the search icon in the header of the form (or press ALT+G) and then type in excel into the search box. Then you will be able to select the Excel workbook designer maintenance form from the dropdown list.

This will open up the Workbook designer form listing all of the data entities that we can create template from.


We want to create an import template for the Main account data entity so we will start off by filtering down the entities by typing in main into the filter box.

That will filter out most of the data entities and then we will be able to select the MainAccount data entity.

Also within the Available fields list box we will see all of the fields from the entity that we can use within our import template.

Start off by selecting the Chart of accounts field and click on the right arrow button.


This will move the Chart of accounts field over to the Selected fields list box.


Then add the Main account, Name, Main account type and Main account category fields over to the Selected fields list.

Now that we have all of the fields that we need to set up the Main Accounts we can click on the Open workbook link within the menu bar.


When the Open in Excel panel is displayed we will then be asked where we want to save the file to.

In this example we will just download the file locally and click on the Download button.


This will open up a dialog box and allow us to save the Excel file locally, or just open it up. In this example we just click on the Open option.


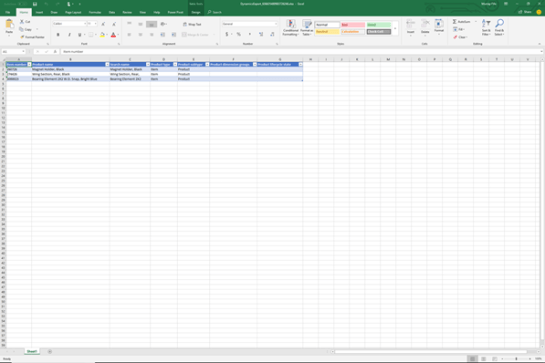
This will then open up the Excel template for us. In order to see all of the data and also use the Office Add-In you may be asked to Enable Editing buy clicking on the button in the header.


The add-in will now link up with Microsoft Dynamics, retrieve all of the metadata for the Main Account entity and then retrieve all of the data for the entity as well.

We can now see all of the data within Excel that we had within the main interface.


Populating the Import Template

Now we have a template that we can use for the import. All that is left to do before we start importing in all of our Main Accounts is to fill in all of the data into the template.

How to do it…

Step 1: Open the Main Account template

To do this we will return back to our Excel workbook and refresh the connection.


Step 2: Enter in the Main Accounts and save the file

Now can now enter in all of your main accounts into the templates columns.

If you want to use a standard set of main accounts, then we have made this a little simpler and have created a CSV file with all of the necessary Main Accounts that will be used throughout these guides. We have posted them on the Dynamics AX Companions (http://www.dynamicscompanions.com) site. If you don’t want to manually enter in a few hundred accounts, then just download this version them and then copy and paste the data over into the import worksheet.


To update the Main Accounts within Microsoft Dynamics, all we have to do is click on the Publish link within the Office Add-In.


When we return back tour Chart of accounts we will now see that all of the Main accounts have been added to our Standard
Chart of accounts.


Conclusion

This is a huge improvement over what we used to have to do in order to import in data. We don’t have to even create the connections within Excel, the Worksheet designer does all of this for us.

How cool is that!


Office Teams are a great new collaboration tool that we can take advantage of within Office 365, and if we are using Office Groups then we can convert them into Teams and start taking advantage of the collaboration that it adds, but still take advantage of the Groups at the same time.

In this walkthrough we will show how you can start doing this.

Prepping your Office 365 Group for Teams

Public Groups cannot be converted into Teams, but Private ones can. So the first thing that we need to do is to make sure that the Group that we want to convert is a Private group.

How to do it…

To do this start off by opening up the Office Group that you want to make available as a Team.


Then click on link on the group and select the Edit group option.


And then when the Edit group panel is displayed, check that the Privacy setting is set to Private – Only approved members can see what’s inside.

Then click on the Save button to close the panel.


Review

Once we have made sure that the Group is Private we can move on.

Converting an Office Group to a Team

Now that we have a Private team we can convert it to an Office Team.

How to do it…

To do this, open up Teams and then click on the Create team button in the bottom left of the screen.


When the Create your team form is displayed, rather than creating a team from scratch, click on the Yes, add Microsoft Team Functionality link at the bottom of the form.


This will open up a list of all the Groups that you can enable through Teams and then click on the Choose team.


That will then make the Group show up in the Team list.


Review

How cool is that. Now we can access the Group, or collaborate within a Team.

Moving files to Your Team Channel

One piece of housekeeping that we need to take care of after we have surfaced the Group as a Team is to move any files that you have stored away within the group. The file structure will change a little with each conversation creating a folder within the group files. So to make them available within Teams we just need to move them a little.

How to do it…

For example when we create the team then by default a General conversation is created.


If we swap over to the Group we will see that there is a folder for the General Conversation.


If we have any files then just click on the option button for the file and then click on the Move to link.


This will open the Move options panel and we can select the conversation folder that we want to move the file to.


Then click on the Move here button.


That will move the file to the conversation.


Review

All you need to do is move any other files over to any other conversations that you have.

Summary

How cool is this – Teams supercharge the Groups functionality.

With the release of Microsoft Dynamics 365 this month we have started the process of updating all of our content to include versions of the guides especially for this version. We are happy to say that the first one is in the can and if you want to check it out here are all of the details.

BBCG02: Configuring An Legal Entity Within Dynamics 365 for Operations

There is no better way to start learning Dynamics 365 for Operations then to just dive in and start setting it up from a blank slate. As you start sculpting your system you are able to see how everything fits together and will also give you the muscle memory that will make you a ninja when it comes to using it in the future.

For traditional ERP systems, this is easier said than done because you need to first get the system installed, and then you don’t know where to even start. Luckily with Azure Hosting, and the pre-built demonstration environments that Microsoft deliver through their Lifecycle services, firing up a new system to learn in is a breeze.

In the following guide we will show you how to set up all of the necessary codes and controls within the Organizational area of a new Dynamics 365 for Operations environment so that when you do start setting up the Dynamics 365 for Operations system, everything will run smoothly for you.

Topics Covered

  • Configuring The System For The First Time
  • Configuring Your Organizational Settings
  • Configuring Your Legal Entity

We have expanded the content from the original version that was written for Dynamics AX 2012, including the new ways that we are able to import in data directly from import packages. For example – now you don’t have to hunt around for the zip code import file, it’s available through Lifecycle Services.

If you are interested in checking this guide out (or the earlier versions like the one for AX 2012) then here is a link to the all of the versions of this guide: http://bit.ly/2f7xHyE

If you are really up for a challenge, then you may want to take on the Bare Bones Configuration Challenge. You can start with this guide and as we start releasing out the other 15 guides in the series then you can work through them as well. These guides will teach you how to configure a bare bones installation of Microsoft Dynamics 365 from scratch. If you complete all sixteen modules, then you will become a Bare Bones Configuration Privateer and we will send you a badge to prove it.

Or if you want to go retro then you can do exactly the same thing with Dynamics AX 2012 – all of the guides are already available.

Also, if you want all of the content on the site and all of the new content that we are delivering then you may want to think about signing up for a Premium Membership. Once you have that you can plunder the entire site and download any of the books at any time. Here is the link: http://bit.ly/2fYMgTW

Also you may have noticed that we have had a small rebranding of the site – with the dropping of the AX from Dynamics, we decided to do the same as well. Now we are just Dynamics Companions.

Why is this important? Because that means we can now create content for you on all of the Microsoft Dynamics suite – how cool will that be.

There has been a lot of talk about the Common Data Model, Power Apps and Flow recently and how it could be used. One of the ways that we have found the most useful is with the synchronization of data between CRM and AX. Usually this would be a painful process of creating web services on both sides of the applications and then trying to tether them together with some additional code.

Flow and the Common Data Model are another option, and in just a couple of minutes you can easily build a synchronization service that does just that. In this walkthrough we will show you how you can do just that.

Creating A Synchronization Flow From CRM To The CDM

The first thing that we will need to do is to synchronize the CRM Account records with the Common Data Model so that every time a new record is created then it is copied up to the Common Data Model database.

How to do it…

Luckily this is not a hard task because flow comes pre-packaged with templates that do just that. All you need to do is search the templates for the Copy new Dynamics CRM Accounts to Common Data Model customer organizations template and click on it.


When the template information is shown, all we need to do is click on the Use this template button.


Flow will check that we have connections to the Common Data Model and also to CRM and then we can click on the Continue button.

This will create a simple Flow for us and we just need to configure a few things.

Start off by selecting the CRM Organization Name from the dropdown list.

And then select the CDM Namespace from the dropdown list.

After we have done that we can just click on the Create flow button to create the flow.


There are a number of these templates available that will synchronize the Cases, Contacts, and Leads with the Common Data Model, and if you want extra credit then it’s easy to add those to our Flow library.


Creating A Synchronization Flow From the CDM To AX

Now we have created the flow that will synchronize CRM to the CDM we can create the other side of the process which will create a new Customer Account within Dynamics AX whenever a new Customer record is created within the CDM database entity.

How to do it…

To do this we just create a new flow with a trigger of when the Customer entity within the Common Data Model is updated.


And then add an action that creates a new record within Dynamics AX, and passes through the Customer ID and the Full Name from the CRM Account Record.


Seeing The Synchronization In Action

Now that we have out two trigger events we can take a look at the whole process in action.

How it works…

All we need to do is create a new Account record within CRM and save the record.


This will trigger the flow that moves the record from CRM over to the Common Data Model.


If we drill into the flow execution then we will see that it both tracked that the customer was created and then it created a record.

If we expand out the trigger event then we will see all of the CRM data that was passed through into the Flow.


And then we will be able to see all of the fields that were automatically passed over to the Common Data Model entity record.


If we look at the second Flow that is moving the data from the Common Data Model to AX then we will also see that the flow triggered for that as well.


Drilling in we will see that the event was triggered based off the Common Data Model Entity being updated and then an action was performed to create a new Customer record within Dynamics AX.

Looking at the trigger event we can see the data that was added within the Common Data Model entity record.


And also we can see the new record details that we created within Dynamics AX.


If we look in Dynamics AX then we will see that a new record was created and it was assigned the same Customer number as the record within CRM.


Review

I don’t know about you, but I think that is pretty darn cool, and super easy to set up.

About the Author

Murray Fife is a Technical Solution Professional at Microsoft and an Author of over 25 books on Microsoft Dynamics AX including the Bare Bones Configuration Guide series of over 15 books which step the user through the setup of initial Dynamics AX instance, then through the Financial modules and then through the configuration of the more specialized modules like production, service management, and project accounting. You can find all of his books on Amazon at http://www.amazon.com/author/murrayfife.

Murray is also the curator of the Dynamics AX Companions (www.dynamicsaxcompanions.com) site which he built from the ground up as a resource for all of the Dynamics AX community where you can find walkthroughs and blueprints that he created since first being introduced to the Dynamics AX product.

Throughout his 25+ years of experience in the software industry he has worked in many different roles during his career, including as a developer, an implementation consultant, a trainer and a demo guy within the partner channel which gives him a great understanding of the requirements for both customers and partner’s perspective.

For more information on Murray, here is his contact information:

Email:         mufife@microsoft.com
Twitter:     @murrayfife
Facebook:     facebook.com/murraycfife
Google:     google.com/+murrayfife
LinkedIn:     linkedin.com/in/murrayfife
Blog:         atinkerersnotebook.com
Docs:         docs.com/mufife
Amazon:     amazon.com/author/murrayfife